Category: BBQ Injections

  • Bone-In Turkey Breast on a Weber Kettle Grill

    Bone-In Turkey Breast on a Weber Kettle Grill

    When Thanksgiving starts creeping up on the calendar, most folks start thinking about cooking a giant turkey. This requires hours spent basting, checking, and hoping the whole thing doesn’t dry out. But if you’re like me, the idea of firing up the grill for the holiday turkey just feels right.

    That’s why this year, I went with a bone-in turkey breast on the Weber Kettle. It’s simple, it’s juicy, and it’s perfect for smaller gatherings. It’s also nice because I didn’t need to wrestle with a full-size turkey. Plus, when I smoked it on the Weber Kettle, it brought back memories of Dad cooking on the kettle when I was a kid.

    Why Choose a Bone-In Turkey Breast?

    A lot of people overlook the turkey breast when it comes to Thanksgiving. But it’s one of the easiest proteins to cook for the holiday:

    • The bone helps retain moisture
    • It cooks faster than a whole bird
    • It fits perfectly on a 22-inch Weber Kettle
    • It’s ideal for families who mostly prefer white meat
    • It frees up the kitchen for stuffing, rolls, and pies
    • Save the carcass and use it for gravy or broth

    And let’s be honest, a lot of it is about presentation and impressing the in-laws by slicing into a smoky, juicy turkey breast.

    Why Choose the Weber Kettle for This Cook

    There’s something timeless about the Weber Kettle. Most of us watched a parent or grandparent flip burgers on one while wearing high socks back in the day. It’s a grill that’s as iconic as watching football on Thanksgiving Day.

    For turkey, the kettle does several things extremely well:

    • It delivers steady indirect heat
    • Allows for clean, consistent airflow
    • Makes it easy to add wood chunks for that holiday smoke flavor
    • Doesn’t require fancy equipment or accessories

    This cook is perfect for backyard beginners and seasoned pitmasters alike.

    Prep: Keeping It Simple

    I am a minimalist and kept the bone-in turkey breast recipe straightforward on this one. No need to complicate things for the Thanksgiving meal.

    Here’s the basic game plan:

    1. I purchased a 7 lb bone-in turkey breast from my local grocery store
    2. Rinse and pat the turkey breast dry
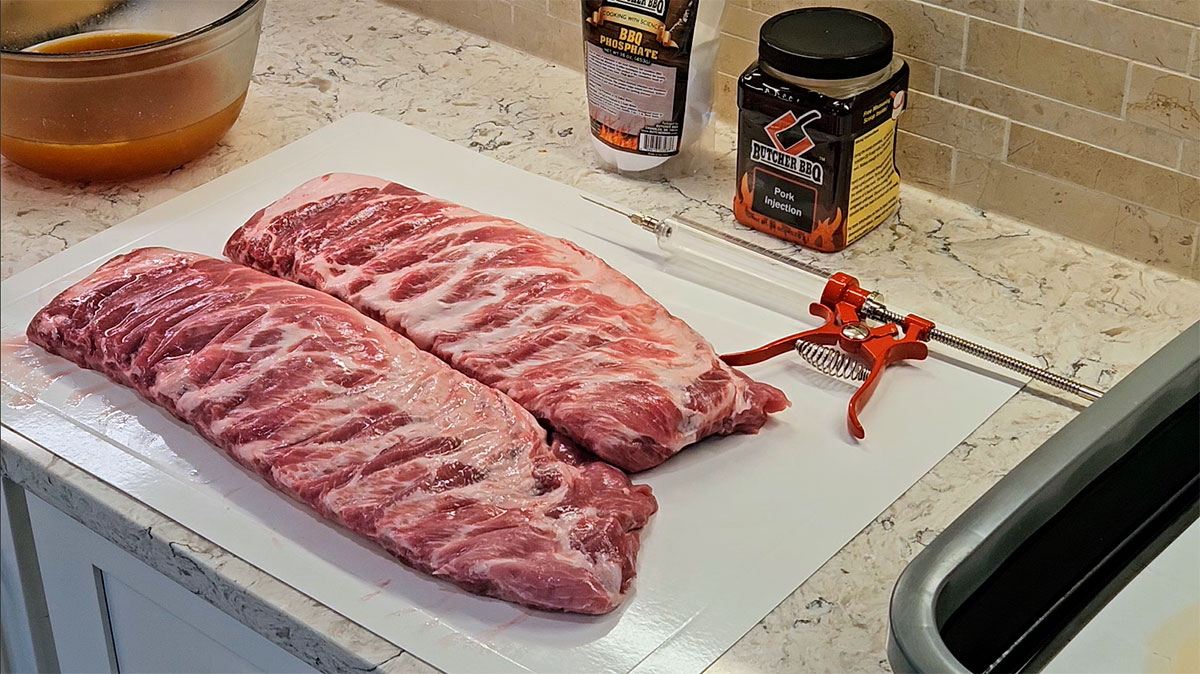
    3. Season generously with your favorite BBQ rub. I used Butcher BBQ Grilling Addiction for this one.
    4. Optional but recommended: a quick injection using Butcher BBQ Original Bird Booster for added moisture using our BBQ Injector.
    5. Let it rest while you fire up the grill

    Nothing fancy. Just honest, simple BBQ.

    Setting Up the Weber Kettle

    This part is covered visually in my YouTube video, but here’s the overview:

    • Use indirect heat
    • Set up a charcoal bank or a modified snake method. I used my Original Slow ‘N Sear paired with a Drip ‘N Griddle Pan.
    • Add 2 chunks of apple wood
    • Stabilize the kettle around 275–300°F
    • The turkey sits opposite the coals so it cooks evenly

    Smoking the Turkey Breast

    • Once the kettle is running steady:
    • Place the breast skin-side up over the indirect zone
    • Close the lid and let the Weber do the work
    • Check temps occasionally with a probe thermometer

    Your target internal temperature is 160°F in the thickest part of the turkey breast. It will carry over to 165°F while resting.

    This results in meat that’s incredibly juicy, tender, and full of flavor for the Thanksgiving meal.

    The Rest & The Slice

    Let your bone-in turkey breast rest for at least 15 minutes. This step lets all those juices settle back into the meat.

    Then comes the best part, slicing into that perfectly cooked breast. If you used Butcher BBQ Original Bird Booster, the breast will be full of juices and flavor! Your guests will thank you! It’s everything you want for a holiday meal. I provide step-by-step instructions on how to inject your turkey breast in the video below.

    Why This Is Perfect for Thanksgiving

    Cooking a bone-in turkey breast on the Weber isn’t just convenient – it’s smart:

    • It frees up oven space
    • It cooks predictably
    • It scales easily for small gatherings
    • It delivers that nostalgic, smoky flavor that reminds us of family cookouts

    Plus, leftovers make unbeatable sandwiches the next day.

    In Conclusion

    So there you have it, you now know how to smoke a bone-in turkey breast on a Weber Kettle. If you want to see the setup, the grill temps, the color, and the final slice, be sure to watch my YouTube video.

    Let us know how your Thanksgiving meal turned out if you decide to smoke a bone-in turkey breast this year!

  • Smoked Boneless Turkey Breast on the Weber Kettle

    Smoked Boneless Turkey Breast on the Weber Kettle

    Remember those Thanksgivings in the ’80s, when Dad would fire up the Weber in the backyard even if snow was falling? The smell of charcoal mixing with turkey fat, the sound of that metal lid clanking—it was a simpler time. That’s the vibe I chased in my latest cook: a boneless turkey breast smoked low and slow on the Weber Kettle using the classic snake method.

    Why Go Boneless?

    If you’re a Gen X guy juggling work, kids, and the holiday rush, this one’s for you. No wrestling a 20-pound bird, no marathon cook—just a 3–4 lb. boneless turkey breast that smokes to perfection in a couple of hours. It’s the ideal size for a small Thanksgiving or weekend dinner, feeding four to six without taking over your entire day.

    And here’s the best part: boneless turkey breast soaks up flavor like a sponge, especially when you use an injection. That’s where the Butcher BBQ Pistol Grip Injector comes in—it’s built for precision and power, pushing that injection deep into the meat for juicy results every time.

    What You’ll Need

    • 3–4 lb. boneless turkey breast, thawed
    • 1 bottle Butcher BBQ Original Bird Booster for injecting
    • Butcher BBQ Pistol Grip Injector
    • My homemade turkey rub:
      • 2 tbsp smoked paprika
      • 1 tbsp fine kosher salt
      • 1 tbsp black pepper
      • 1 tbsp onion powder
      • 1 tbsp garlic powder
      • 2 tsp rosemary
      • 1 tsp dried mustard
    • Charcoal briquettes
    • Applewood chunks or chips
    • Butter or Parkay spray for basting

    Prep the Boneless Turkey Breast

    Prep is quick and easy:

    1. Pat dry the turkey breast with paper towels.
    2. Using your Butcher BBQ Pistol Grip Injector, inject the Bird Booster mixture in a grid pattern. Use about 1/8 cup of Bird Booster powder mixed with 1 cup of water for this size cut.
    3. Season evenly with the homemade turkey rub, coating all sides. Let it rest for 30–60 minutes while you set up the grill.

    That rub smells amazing! It has a hint of BBQ smoke and a touch of rosemary to keep that Thanksgiving flavor alive.

    Weber Kettle Snake Method Setup

    Now, let’s fire up the Weber Kettle using the snake method—old-school, reliable, and perfect for steady low-and-slow cooking.

    1. Line charcoal briquettes in a “C” shape around half the grill, two briquettes wide and two high.
    2. Add three applewood chunks along the snake for that sweet, mild smoke.
    3. Light 8–10 briquettes at one end of the snake and let them gradually ignite the rest as it burns around.
    4. Set a drip pan in the center and fill it halfway with water.

    You’re aiming for a grate temperature between 240–260°F (115–126°C). Once you’re dialed in, place the turkey breast in the center of the grate.

    Smoking & Basting

    Insert a probe thermometer to track internal temperature and let the Weber do its thing.

    • After 2 hours, baste with melted butter or Parkay spray to keep the surface golden.
    • Rotate the breast if needed for even color.
    • If the skin starts drying out, a quick spritz of water helps keep it moist.

    When the internal temp reaches 160°F (71°C), double-check with an instant-read thermometer. Pull it off the smoker—carryover heat will bring it up to 165°F (74°C) while it rests. Tent loosely with foil for 15–30 minutes before slicing.

    If you placed a pan under your turkey, those drippings make an incredible base for gravy.

    A Few Tips from the Pit

    1. Don’t skimp on the injection. The Bird Booster and Pistol Grip Injector combo keeps the meat juicy, even if you overcook slightly.
    2. Watch your snake. If the line breaks or dies out around the bend, relight with a few hot coals.
    3. Leftovers? Use them for smoked turkey chili or a turkey noodle soup that’ll bring back childhood memories.

    In Conclusion

    There you have it—a simple, flavorful way to smoke a boneless turkey breast on your Weber Kettle. It’s quick, low-stress, and packed with that nostalgic backyard BBQ flavor.

    Tag me if you try it and share your Weber stories, I’d love to hear how your cook turned out. Here’s to Thanksgivings that feel like home, just with a little more smoke.

  • Beef Dino Ribs – Brisket on a Stick

    Beef Dino Ribs – Brisket on a Stick

    There’s something primal about a slab of beef dino ribs sizzling away in the smoker. The name alone sounds like it belongs in a caveman’s cookbook, and honestly, that’s not far off.

    These massive bones packed with tender, juicy beef are often called “brisket on a stick.” When done right, smoked dino ribs deliver that same deep beef flavor and rich bark that brisket fans look for.

    What Exactly Are Beef Dino Ribs?

    When folks talk about dino ribs, they’re usually referring to plate short ribs. These are the big, meaty bones cut from the lower section of the cow’s rib cage. These aren’t your typical short ribs from the grocery store.

    Each bone can weigh over a pound and looks like something Fred Flintstone would throw on the grill. It’s no wonder they’re sometimes called dinosaur beef ribs. They’re packed with marbling, collagen, and pure beef flavor.

    Dino ribs rank as one of the most rewarding cuts you can smoke low and slow.

    If you’ve never cooked smoked beef dino ribs before, think of them as the love child between brisket and a prime rib roast. They’ve got the bark and smoke ring of brisket, but the tenderness and juiciness that rival any high-end steakhouse.

    The Prep: Keep It Simple

    For these big cuts, simple always wins. I start with a light trim, rounding the corners and removing any loose fat. My go-to tool is the Butcher BBQ Boning Knife for precise trimming.

    A quick coating of binder is optional. I like a little yellow mustard when I use a rub binder.

    Then I season generously with a Texas-style rub: coarse black pepper, kosher salt, and that’s it. When you’re dealing with beef this good, you don’t need to overcomplicate it.

    If you really want to add some serious flavor, try injecting the ribs with a beef brisket injection marinade. I recommend Butcher BBQ Brisket Injection — this beef injection helps add moisture and another layer of rich, beefy flavor deep into the meat.

    The Cook: Low and Slow

    I smoked these dino ribs on my Weber Smokey Mountain at 250°F using post hickory wood chunks for that classic BBQ flavor.

    These ribs will take anywhere from 6 to 10 hours of cooking time. However, this depends on thickness, so plan for a long, relaxing day by the pit. Personally, this is my happy place — some music playing, a cold drink in hand, and the Weber Smokey Mountain doing its thing!

    I don’t wrap mine until they hit around 170–175°F internal temp. Then I’ll wrap them tight in butcher paper to protect that delicious bark while they finish.

    After wrapping, the internal temp we’re looking for is around 203°F, but don’t go by temp alone. Use a temp probe and probe the sides. You’re looking for that “soft butter” feel with zero resistance. That’s when you know the dino ribs are ready!

    Once the dino ribs have finished cooking, I transfer them to a cooler to rest for about an hour.

    After the rest, I transfer the ribs to one of my Butcher BBQ Disposable Cutting Boards. It keeps cleanup simple and gives me plenty of room to work without losing any juices.

    The Payoff

    When you pick up one of these ribs, you’ll know exactly why they’re called “dino” ribs. The bone alone looks like a handle made for kings. The bark is dark and crusty, the inside jiggly and buttery tender.

    Take that first bite and you’ll get all the smokiness, salt, and beef flavor that backyard barbecue dreams are made of. Whether you call them smoked beef dino ribs or dinosaur beef ribs, one thing’s for sure — they’ll steal the show at any cookout.

    This is one of those cooks that takes you back — to when weekends meant firing up the pit, grabbing a cold drink, and letting the world slow down for a while. No apps, no notifications, just you, the smoke, and the sound of sizzling beef.

    In Conclusion

    If you’ve never smoked beef dino ribs, make this your next weekend cook. It’s the kind of meal that’ll turn a quiet afternoon into a backyard event.

    Fire up the pit, grab your favorite rub, and make some memorie, because that’s what barbecue’s all about.

  • How to Smoke a Turkey Breast on a Weber Smokey Mountain

    How to Smoke a Turkey Breast on a Weber Smokey Mountain

    The unofficial “end of summer” holiday just passed and as the days are getting shorter the holidays are coming. What better way to start preparing for Thanksgiving than with a quick turkey breast for smoking! It’s great for a quick weekday meal, so let’s talk about it!

    Why Smoke a Turkey Breast

    A smoked turkey breast is a quick and easy meal for a weeknight, family gathering, or Thanksgiving. This boneless turkey breast was about 3 lbs. and the total cook time was just under 3 hours. What’s nice about smoking a turkey breast is it’s much easier than a full-size bird. It fits nicely in a small smoker, like a 14-inch Weber Smokey Mountain.

    Also, using a turkey injection, like Butcher BBQ Original Bird Booster, results in a juicy and flavorful dinner. It is less intimidating for new pitmasters. Injecting is quicker than wet brining and makes less of a mess.

    What You Need to Smoke a Turkey Breast

    • Turkey breast (bone-in or boneless) from your local grocery store.
      • I used a Butterball All Natural 3 lb. boneless turkey breast for this cook.
    • Rub – I used my go-to homemade turkey rub for this one:
      • 2 tablespoons of smoked paprika
      • 1 tablespoon of fine kosher salt
      • 1 tablespoon of ground black pepper
      • 1 tablespoon of finely ground onion powder
      • 1 tablespoon of finely ground garlic powder
      • 2 teaspoons of rosemary
      • 1 teaspoon of dried mustard
    • Optional, but highly recommended Butcher BBQ Original Bird Booster injection for added moisture and flavor.
    • Wood chunks – fruit woods work well for poultry; I used apple chunks for this cook.
    • Charcoal for the WSM – I used B and B Competition Briquettes for this cook, set up with the Minion Method.

    Smoking a Turkey Breast Step-by-Step on the 14-Inch Weber Smokey Mountain

    Now that you have all your supplies, let’s prep the bird.

    • Rinse the breast and pat it dry.
    • Mix your Butcher BBQ Original Bird Booster and inject the turkey breast.
      • I mixed half of the recommended 1/4 cup to 2 cups of water for 10 lbs. of meat.
      • Instead, I mixed 1/8 cup of Bird Booster to 1 cup of water since my turkey breast was 3 lbs.
      • Inject it with a pistol grip injector.
    • Use the injection as a binder and apply the turkey rub.
    • Let the turkey rub rest on the meat while you fire up the WSM.

    Set Up the 14-Inch Weber Smokey Mountain

    The 14 inch Weber Smokey Mountain was my first smoker. My wife purchased it for me and I learned so much with it. It is a great starter smoker for anyone who is interested in the hobby!

    Now back to the WSM setup:

    1. Fill the WSM charcoal ring with briquettes or lump charcoal.
      1. I like using the Minion Method when I cook on my Weber Smokey Mountain. The Minion Method offers a steady heat and a consistent burn.
    2. Add a couple chunks of apple wood to the charcoal basket.
    3. Add some water to the water pan; personally I like to leave it dry and just wrap it in aluminum foil for easy cleanup.
    4. We are shooting for a grate temperature of 250–275°F.

    Cooking the Turkey Breast

    Ok, now that the smoker is up to temp, grab your turkey breast and place it on the WSM’s top rack. You will want to put a temp probe to keep an eye on the internal temperature. Now, monitor the cook and when the internal temp reaches 140°F baste it with butter.

    When the internal temp of the breast reaches 160°F, pull and let it rest for 15–20 minutes. The carryover cook will bring the temp up to 165°F. Your turkey breast should have a beautiful mahogany red and brownish color to it!

    We have a video explaining how to cook a turkey breast below:

    In Conclusion

    Smoking a turkey breast is easy! It just takes some time to prepare for the cook. Once it is finished, you will have a delicious, juicy, flavorful meal for the weekday or any occasion. Butcher BBQ Bird Booster also saves you time by not brining the turkey breast for 12-24 hours.

    With a 14 inch Weber Smokey Mountain and this newfound knowledge, you will be known as “Mr. Turkey” going forward! Let’s get to cooking and please leave us a comment below on how your smoked turkey breast turned out!

  • How to Inject a Turkey

    How to Inject a Turkey

    How to inject a turkey is an easy process. It only takes a little patience and time to learn how to do it. Remember the “National Lampoons Christmas Vacation” turkey? Yeah, let’s talk about how to avoid a dry turkey this year!

    Why Inject a Turkey

    Why do we inject a turkey you ask? Let me start out by saying, if you have never smoked a turkey, this will forever change your Thanksgivings going forward! A properly injected turkey, with the smokiness from a BBQ pit, beats a bird cooked in an oven any day!

    Here are a few reasons why we inject a turkey:

    1. It is quicker than wet brining.
    2. Add additional flavor deep into the meat.
    3. Prevents the meat, especially the breast meat, from drying out.

    What Tools do You Need to Inject a Turkey

    The tools we recommend to inject a turkey are below:

    That’s pretty much it.

    The Turkey Injection Process

    Now, we get to the good stuff, the turkey injection process! The mixing process is very easy. Once you take the time to inject, you will be AMAZED at how much moisture and flavor is in your bird!

    Mixing the Injection

    First, mix your injection. We are using Butcher BBQ Original Bird Booster in this example. It suggests 2 cups of water and ¼ cup or one full scoop of Bird Booster.

    Turkey Injection - Butcher BBQ Bird Booster - Scoop

    Add the water to a bowl and use a whisk or immersion blender to mix the Booster. It is quick dissolving, so it only takes about 30 seconds, and we are ready to inject the turkey!

    Inject a Turkey - Mixing

    This 2-cup mixture will inject a 10-15 lb turkey. If you are injecting multiple turkeys or a larger bird you will want to double the mixture.

    Pro Tip – Each turkey injection has a specific amount needed to get the proper flavoring. Be sure to read the instructions before mixing.

    Injecting the Bird

    When injecting a turkey, I use a pistol grip injector. It comes with a large and small needle. I have used both a larger needle and a smaller needle when injecting a turkey. In my experience the smaller needle works better.

    Using a larger needle is harder to distribute the injection evenly throughout the meat. The larger needle tends to pool and create a “pocket” of the injection in the meat.

    On the other hand, with a smaller needle it’s easier to distribute the injection evenly throughout the meat.

    Inject the turkey in a checkerboard pattern as best as you can, particularly with the breast meat. You want the breast meat to be as full of injection as possible.

    How to Inject a Turkey - Inject a Turkey

    Now, as you inject, you want to pull the needle out slowly and this will help distribute the injection in the meat.

    You will know when the turkey breast is full because injection will come out of previously injected areas.

    The dark meat has more intramuscular fat, while you still want to inject these areas, the breast and wings are your main focus.

    Also, when injecting the wings it is much easier to inject with the smaller needle!

    Turkey Injection - Wing

    In Conclusion

    Well, that is about it when it comes to injecting a turkey. Your primary focus is on the turkey breast meat, but make sure to get the wings, legs, and thighs as well.

    When Thanksgiving rolls around this year, if you follow this process, you will be known as “Mr. Turkey” going forward!

    When you are finished, dust it with some rub and it is ready for the smoker!

    We would love to hear from you, please post a comment below and let us know how the process worked!

  • How to Inject Ribs

    How to Inject Ribs

    BBQ ribs are a go-to meat for any pitmaster. When you learn how to inject ribs, it changes everything! Your St. Louis ribs, babyback ribs, and spare ribs will be bursting with moisture and flavor!

    BBQ Ribs That Squeeze Out the Moisture

    Let’s be honest: sometimes ribs come out a little dry. I’ve done it, you’ve done it, and if you haven’t, you will. It’s inevitable.

    Now imagine biting into a juicy, flavorful pork rib! A St. Louis rib so full of moisture you can literally squeeze the juices out! That’s what I’m talking about!

    Why Inject Pork Ribs?

    Why inject ribs? It’s simple: to add moisture and flavor. Injecting ribs changes the flavor profile internally and complements your BBQ rub.

    What Do You Inject Ribs With?

    You can inject ribs with anything from apple juice to BBQ phosphates. We recommend using Butcher BBQ Phosphate and Butcher BBQ Pork Injection. These are what the pros use for injecting ribs in competition!

    The phosphates lock in moisture at the cellular level, and the pork injection adds an amazing flavor that has won championships!

    How to Inject Ribs - Inject Pork Ribs - BBQ Injector

    What Are BBQ Phosphates?

    BBQ phosphates are a type of salt that “grab” water and hold onto it when you inject your ribs. Learn more in our blog post on “What is BBQ Phosphate Injection?”

    What You Need to Inject Ribs

    When you plan to inject ribs, you only need a few tools:

    The Rib Injection Process

    Now to the fun part! Measure out the recommended quantity of BBQ Phosphate and Pork Injection. Slowly add the dry ingredients to water and mix thoroughly to remove clumps.

    Many pitmasters inject ribs from the top, but we suggest injecting from the side. In our experience, this results in better bark formation.

    Inject one side of the ribs, spin it around, and inject the other side. Piece of cake!

    How Much to Inject?

    Pork ribs aren’t the thickest meat, so you don’t need much—about 2-3 cc of injection per side. Our BBQ Injector lets you dial in specific amounts! Using the smaller needle, set the chrome circular dial to 2 or 3 cc. Each pull injects that exact amount.

    How to Inject Ribs - Inject Pork Ribs - BBQ Injector Dial

    Pull the trigger as you remove the needle, and you’re done! Each rib should hold about 50 cc of fluid total. You’ll know it’s full when fluid starts shooting out the top or sides.

    How to Inject Ribs - Injecting Ribs for Competition

    In Conclusion

    Now you know how to inject ribs! You have the tools and the knowledge, all that’s left is to take action!

    How to Inject Ribs - Inject Pork Ribs - BBQ Rub

    We’d love to hear about your process! Please leave us a comment below!

  • What is BBQ Phosphate Injection?

    What is BBQ Phosphate Injection?

    You have heard about BBQ phosphate injection, but you are not sure what it is. It is a technique pitmasters use to inject meat to enhance moisture retention to keep meat from drying out.

    BBQ Phosphate Injection – How It Works

    BBQ phosphate injection is a type of salt in a powder form. When mixed with water, it creates an injection. This phosphate injection will bind to water molecules to muscle cells in the meat. The muscle fibers will then expand, allowing the meat to hold more water.

    Using a phosphate injection for brisket, for example,  reduces the dryness when smoking a brisket for 12-18 hours.

    Improves Tenderness

    We all know the ultimate goal of BBQ is to have juicy, tender, delicious meat. In addition to moisture retention, Butcher BBQ Phosphate will improve the tenderness of the meat as well.

    The phosphates play an additional role as a tenderizer. As the injection does its thing, it will also break down tough muscle fibers and connective tissue.

    However, make sure not to add too much injection! Adding too much phosphate will result in a “mushy” texture. This will not be good for the judges or your family!

    BBQ Phosphate Injection – How to Use It

    Using a BBQ phosphate injection is very easy. All you need is some water and a bag of Butcher BBQ Phosphate.

    1. Blend ¼ cup of Butcher BBQ Phosphate with 2 cups of water.
    2. You can use a whisk, but we would suggest an immersion blender.

    Pro Tip – Add the phosphate slowly to your water and mix as you add. If you dump the ¼ cup into the water, it will clump, forming hard pieces very quickly! This will not result in the injection you are anticipating.

    Mix with Other Ingredients

    This is the fun part of BBQ, experimentation! Whatever your flavor profile, add other ingredients to your barbecue phosphate injection.

    If you are smoking a pork butt, use some Butcher BBQ Pork Injection. Smoking a brisket, add some Butcher BBQ Prime Brisket Injection to your phosphate injection for brisket.

    If you want it to be sweeter, also add some apple juice or honey into the BBQ phosphate injection. It’s all about adding layers of flavor!

    Inject the Meat

    Use a BBQ Injector to distribute the BBQ phosphate injection into your meat. We suggest using a checkerboard pattern, rotating 90 degrees until the meat will not take any more injections.

    Now your meat is ready for the smoker!

    In Conclusion

    Now you know what a BBQ phosphate injection is. Be sure to follow the instructions and look for a high-quality product, like Butcher BBQ Phosphate. This is definitely a pitmaster essential!

    Now it’s time to start experimenting, so let’s get that pit fired up and start cooking!