Category: Uncategorized

  • How to Smoke Beef Back Ribs

    How to Smoke Beef Back Ribs

    So you picked up a beef rib rack and you’re thinking about firing up the smoker. Good choice. Beef back ribs don’t always get the spotlight, but when cooked right, they deliver deep beef flavor, great bark, and a satisfying bite that feels earned.

    If this is your first time cooking BBQ beef back ribs, relax. We’re going to treat these ribs like pork ribs. We will dust them with a Texas style rub, smoke, wrap, rest and let the smoker do the work. This method produces meaty beef ribs that are tender, juicy, and packed with classic barbecue flavor.

    Before you dive in, I also put together a full YouTube video that walks through this cook step-by-step on my Weber Smokey Mountain. If you like seeing the process in real time—fire setup, bark development, and tenderness checks—be sure to watch the video alongside this guide.

    What Are Beef Back Ribs?

    Beef back ribs come from the dorsal section of the rib cage, located just beneath the prime rib. When ribeye roasts or prime ribs are cut, the bones are left behind with a generous amount of meat still attached.

    Beef Back Ribs - What Are Beef Back Ribs

    Despite what some folks think, these are not a substandard cut. When smoked low and slow, barbecued beef back ribs become rich, beefy, and incredibly satisfying. They don’t eat like short ribs, they’re leaner, but when cooked properly, they are tender and full of flavor.

    Rib Prep Process

    Prepping a beef rib rack is simple and doesn’t require much trimming. For this cook, I left the fat intact and only rounded the corners for even cooking. I also left the membrane on the bone side.

    Beef Back Ribs - Trimming Beef Ribs

    Pro tip: Unlike pork ribs, it’s recommended to leave the membrane on beef back ribs. Removing it can cause the ribs to fall apart as they cook.

    Season Those Beef Back Ribs

    You can season smoked beef back ribs with just about any beef-forward rub. I often reach for Butcher BBQ Steak and Brisket Rub, which blends salt, pepper, garlic, and a hint of lemon oil.

    For this cook, I went with a simple Texas-style approach, only salt and pepper to let the beef shine.

    I don’t normally use a binder, but for this beef rib rack, I wanted to make sure the pepper adhered properly.

    1. Lightly sprinkle Worcestershire sauce over the ribs and spread it evenly.
    2. Apply freshly ground black pepper first.
      • Pepper tends to bounce off if other seasonings are applied first.
      • More pepper means better bark on BBQ beef back ribs.
    3. Finish with a generous layer of fine sea salt.
    Seasoning Beef Back Ribs

    Once seasoned, place the ribs in the refrigerator while you fire up the smoker. A rest of 45–60 minutes is ideal. This acts as a dry brine and helps build flavor.

    Prepare the Smoker

    For this cook, I’m using a 22-inch Weber Smokey Mountain, but this technique works just as well on a pellet smoker, ceramic cooker, offset, or drum.

    I set up my WSM using the Minion Method and an Arbor Fabricating charcoal basket. The smaller holes allow the charcoal to burn longer and more evenly.

    For smoke, I used three chunks of hickory. Hickory pairs perfectly with beef and gives smoked beef back ribs that classic barbecue aroma.

    I lit 12–15 briquettes in a charcoal chimney using two paraffin cubes. After about 15 minutes, they were ready to add to the smoker. Allow another 15–20 minutes for the pit to come up to temperature.

    Shoot for a grate temperature of 240–250°F.

    Let’s Get to Cooking

    Once the smoker is steady, place the beef rib rack on the grate, bone side down. At this stage, we’re building bark and letting the smoke do its job.

    Cook the ribs until the internal temperature reaches 165–175°F. This is typically where the bark has set and the ribs are ready to wrap.

    Time to Wrap the Ribs

    When the ribs hit around 175°F, wrap them tightly in two layers of butcher paper. Wrapping helps push through the stall while keeping the ribs moist.

    Wrapping Beef Ribs

    Return the wrapped ribs to the smoker and continue cooking until the internal temperature reaches 195–200°F.

    Wrapped BBQ Beef Back Ribs

    The Beef Back Ribs Are Ready to Rest

    After about 9 hours of low-and-slow cooking, these smoked beef back ribs were sitting at 198°F. Temperature matters, but the tenderness of the meat matters more.

    Using an instant read thermometer, probe between the bones. When the probe slides in with little resistance, the ribs are done.

    Remove the ribs from the smoker and let them rest, still wrapped, for at least 30 minutes. This allows the juices to redistribute and finish tenderizing the meat.

    In Conclusion

    If you’ve never cooked barbecued beef back ribs before, this is a great place to start. They’re forgiving, full of beef flavor, and incredibly rewarding when done right.

    Smoked Beef Back Ribs

    If you want to see exactly how these ribs cooked on the Weber Smokey Mountain, check out the full YouTube video (Beef Back Ribs on the 22 Inch Weber Smokey Mountain | Cold Weather Cooking) that goes with this post. Watching the process can give you extra confidence on your first cook.

    It’s your turn, fire up the pit, trust the process, and enjoy some seriously meaty beef ribs.
  • How to Smoke Chicken Lollipops

    How to Smoke Chicken Lollipops

    How to smoke chicken lollipops? Well let me tell you, it takes a bit of work, but it is worth it. However, there is something special about a chicken lollipop tacked with BBQ sauce!

    Smoked BBQ drumstick lollipops result with a flavorful outside, juicy inside, and a beautiful presentation! It is the kind of snack that makes a great game-day treat. Let’s talk about it.

    Smoked Chicken Lollipops Recipe

    If you love smoked meat, try our smoked chicken lollipop recipe. It is quick, easy, and only requires two ingredients: a BBQ rub and a BBQ sauce.

    Here is a quick guide for smoked chicken lollipops:

    • The smoked chicken lollipop recipe I lean on uses a simple dry rub, Butcher BBQ Honey Rub.
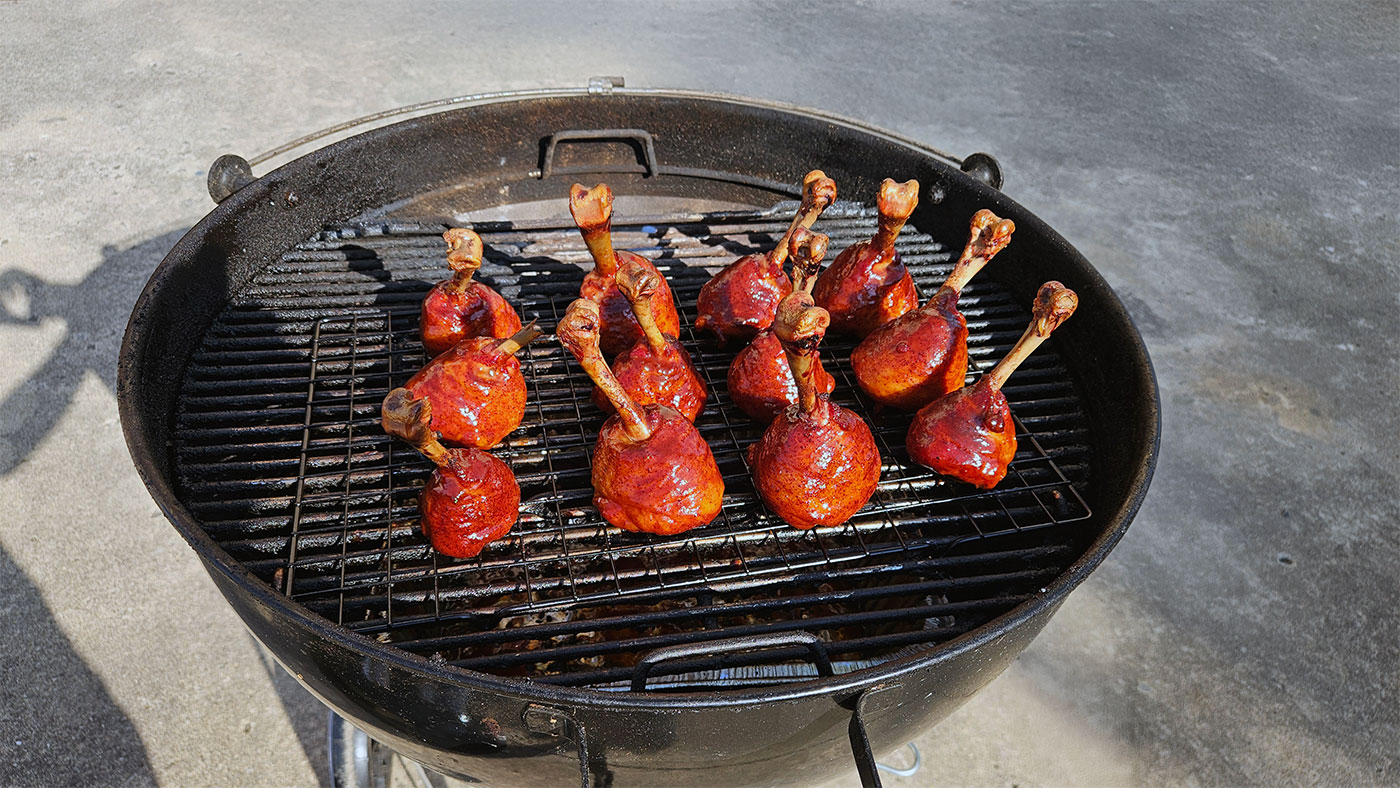
    • A two-hour smoke at 300°F to get an internal temp around 170-175°F.
    • Dunk them in BBQ sauce, I like to use Butcher BBQ Sweet BBQ Sauce.
    BBQ Chicken Lollipop - Butcher BBQ Sweet BBQ Sauce
    • Let the sauce tack up for 10-15 minutes. Rest for another 10-15 minutes and then serve.
    Drumstick Lollipop - BBQ Lollipop

    How to Make a Chicken Lollipop

    Making chicken lollipops is easier than you think. Here is how you do it:

    • Push the skin down toward the base of the chicken leg.
    • Locate where the meat starts to taper on the bone and trim the bone to reveal a clean “handle”.
    • Pull the fat, skin, and remaining connective tissue off the knuckle of the drumstick.
    • Trim off any loose meat and tendons.
    Chicken Lollipop - Drumstick Lollipop
    Smoked BBQ Chicken Lollipops - Butcher BBQ Honey Rub
    • Rest in the fridge while you fire up the smoker.

    BBQ Chicken Lollipops That Shine

    BBQ chicken lollipops bring an amazing presentation to any tailgate for gameday. After the BBQ sauce tacks up they have a beautiful mahogany shine!

    If you prefer it spicy, add some Butcher BBQ Chipotle Rub and glaze it with a Buffalo-style BBQ sauce.

    Tips for Superb Drumstick Lollipops

    Here are some tips for making drumstick lollipops.

    Open the package, pat the meat dry, and leave it in the fridge overnight. This helps to dry out the skin a bit and make for crispier skin.

    Also, here’s a tip to keep your drumstick lollipops sitting up. Grab a chef knife and cut off a small sliver at the end of the leg. This area is just cartilage, and your knife will easily cut through it.

    Drumstick Lollipop

    In Conclusion

    Ok, so there you have it. A quick simple answer to, “How to Smoke Chicken Lollipops”. They are sure to make everyone smile, because who wouldn’t love a BBQ drumstick lollipop! They are sweet, smokey meat candy!

    So grab some chicken drumsticks, a bottle of Butcher BBQ Honey Rub, and get ready for gameday!

  • Simple BBQ Rub Recipe

    Simple BBQ Rub Recipe

    Here is a Simple BBQ Rub Recipe for your upcoming holiday BBQ. As I write this blog post this weekend is the unofficial start of Summer, Memorial Day! Let’s talk about a BBQ rub recipe you can make with a handful of ingredients.

    Why a BBQ Rub Matters

    When it comes to a BBQ Rub, here is why it matters. A simple BBQ rub does two things:

    • It sets the flavor profile for your meat.
    • It helps create that crispy, delicious crust or “bark” on your meat.

    Without a BBQ rub the meat, especially pork, would be very plain and bland.

    Why Make Your Own BBQ Rub

    This is a very simple BBQ rub that will take only a few minutes to mix. Actually, it is a lot of fun to create your own rubs tailored to your flavor profile!

    Also, making your own rub is a perfect time to get the children or grandchildren involved. Sharing your passion of BBQ is a great bonding experience.

    Kids love to learn and experiment. Show them how them how to measure one ingredient and let the kiddos finish the BBQ rub recipe.

    They will love spending time with you and you will make a few memories along the way!

    The Simple BBQ Rub Recipe

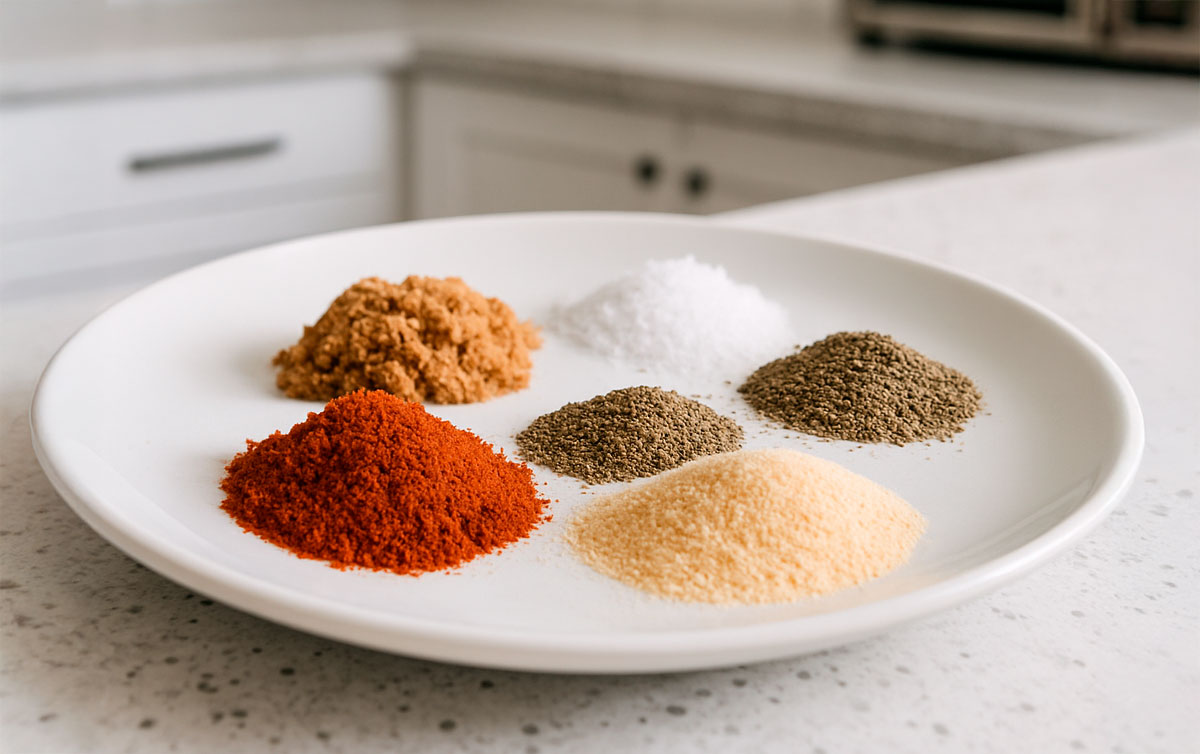
    Ok, back to the rub. Were keeping this BBQ rub recipe simple with 6 ingredients you probably have in your cabinet right now:

    • 1/4 cup brown sugar
    • 2 tablespoons salt
    • 2 tablespoons black pepper
    • 2 tablespoons paprika
    • 1 tablespoon garlic powder
    • 1 tablespoon onion powder

    Pretty straightforward, right? This is an easy rib rub or put it on a brisket for an all nighter!

    Now, let’s quickly go over why we choose these ingredients for our simple BBQ rub:

    • Brown sugar: Brings a touch of sweetness and helps the meat caramelize into that golden goodness.
    • Salt: Boosts all the flavors, dry brines the meant, and tenderizes it a bit.
    • Black pepper: Gives it some kick and depth, main ingredient for bark formation, don’t skip it!
    • Paprika: Adds a gorgeous mahogany color and a hint of smokiness.
    • Garlic powder: Let’s be real, garlic makes everything better.
    • Onion powder: Rounds it out with a savory flavor.

    How to Make It

    Here’s how to make the BBQ rub recipe:

    1. Grab a bowl
    2. Toss all these ingredients in
    3. Mix them up with a whisk or fork until everything’s blended.

    That’s it, very simple! Now take your meat and sprinkle this stuff all over it. Make sure you get every nook and cranny.

    Let it hang out for at least 30 minutes before you throw it on the smoker. If you’ve got the time, let it sit in the fridge overnight. This will dry brine meat and it is well worth the wait!

    Tips and Tweaks

    Here’s where you can have some fun and make this BBQ rub recipe your own:

    • Want a little heat? Add a teaspoon of cayenne pepper and that will put some heat on the backend.
    • Do you want the rub to be a bit more smokey? What I do is swap out the regular paprika for some smoked paprika.
    • Switch up the sugar, sometimes I use turbinado instead of brown sugar. It’s easier to mix because it doesn’t clump as easy as brown sugar.
    • If you want to make your BBQ rub a little fancier. Add some dried herbs like thyme, rosemary, or oregano for an extra layer of flavor.

    Pro tip: If you haven’t used your spices in a year or so, you might want to buy some fresh spices.

    The best part about a rub is you can tweak it until it’s just right for you. Us this as a base, experiment, taste, and make it your own!

    In Conclusion

    There you go, a simple BBQ rub recipe that will have everyone at your next cookout talking. Easily mix and dust your your favorite meat, and let the BBQ rub go to work.

    This rub never fails to impress. Give it a shot and let me know how it turns out, seriously, I want to hear about it!

    Oh, and if you are in a time crunch, swing by our site. We’ve got BBQ rubs, BBQ sauces, and other BBQ accessories you need to keep the pit smoking!

  • 5 Benefits of Cooking Babyback Ribs in the Smoker

    5 Benefits of Cooking Babyback Ribs in the Smoker

    Cooking Babyback Ribs in the Smoker may become one of your family’s favorite meals. They are meatier than spare ribs or St Louis ribs. When these ribs are properly cooked, they are juicy and you accomplish that “perfect bite”!

    Babyback Ribs - Babyback Ribs in Smoker - Cutting Board

    Cook by Temperature, not Time

    So I will just jump right into it, cook your babyback ribs by temperature not time. You likely have heard of the “3-2-1 Rib Method”, yeah wad that up and toss it out the window!

    I have tried the 3-2-1 Rib Method when I first started cooking ribs. The ribs are good, and they do fall off the bone. However, the only issue is they are a little dry and “mushy”. This is because the ribs are overcooked!

    In the beginning I did not know any better and I thought they were good. Well my process has changed.

    Babyback Ribs - Babyback Ribs in Smoker - Smoke Ring

    A Recent Babyback Rib Cook

    Recently I smoked some babyback ribs for dinner. I always keep a log of start time, grate temp, internal temp checks, wrap time, and finish time.

    I started my cook at 2:36 pm and I pulled them to rest at 5:11 pm…that is less than 3 HOURS total cook time!

    The bite was perfect!

    Babyback Ribs - Perfect Bite

    Had I cooked my ribs for another 3 hours they would have been dried out and overcooked. This is why I say cook by temperature and not time!

    Pro tip – If you don’t keep a BBQ log, I would highly recommend it. It helps so much with different weather variations, like humidity, outside temperatures, etc., that can affect your cooks.

    Back to the Benefits of Cooking Babyback Ribs in the Smoker

    Ok, now back to cooking babyback ribs. A lot of new pitmasters stress about cooking babyback ribs. Let me put your mind to ease, because they are so easy to cook!

    1. You have the option to customize the taste.
      • You can experiment with BBQ rubs, BBQ sauces, etc. and tailor it to your specific flavor profile.
      • We suggest using a good quality rub, like Butcher BBQ Honey Rub or Butcher BBQ Cherry Rub.
      • Each of these rubs brings sweet honey and cherry flavor to the pork. When paired with apple wood or cherry wood it is simply amazing!
    2. You can use anything from a Weber Kettle to a Traeger pellet smoker.
      • Personally, I am a little bias towards charcoal smokers. However, pellet smokers are a great option for busy families.
    3. You will experience tender texture for that “perfect bite”.
      • Low and slow cooking will break down connective tissue resulting in juicy, tender ribs!
    4. You will get social!
      • No, I am not talking about social media, but if you post some pics, it is nice when people like and comment.
      • I am talking about social gatherings. Smoking ribs at a family gathering, backyard barbecues, or tailgating is what it is all about!
    5. Last but not least, you will have nutritional control over what you and your family eat.
      • Buying babyback ribs locally and cooking at home gives you control over what ingredients goes into your food.

    In Conclusion

    There you have it, 5 benefits of cooking babyback ribs in a smoker. There’s nothing like firing up the pit and smoking some delicious babyback ribs.

    Try our Butcher BBQ Honey Rub or Butcher BBQ Cherry Rub at your next BBQ. That is where smoke meats flavor!

    Also, please leave us a comment below or reach out to us if you have any questions. We would love to hear about your recent cooks!

  • What are Meat Shredding Claws?

    What are Meat Shredding Claws?

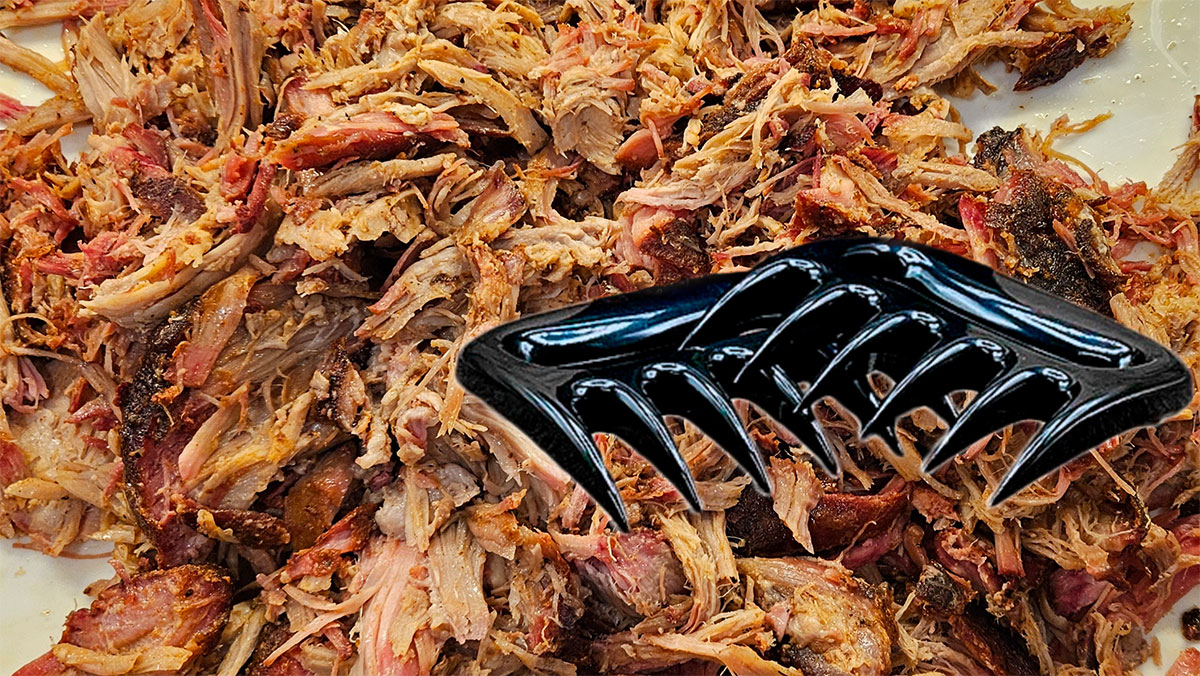
    Meat shredding claws are tools every pitmaster needs in their arsenal. They are handheld plastic claws designed to easily shred or pull meat apart. Let’s talk about them!

    Meat Shredding Claws – What Are They?

    Meat shredding claws, like Butcher BBQ Pork Shredding Claws, make your life easier. They are a must-have gadget for anyone who loves BBQ.

    They make quick work of transforming a pork butt into shredded pulled pork. Pork shredders are simple yet efficient tools designed to make pulling apart meat.

    Meat Shredding Claws - Pork Shredding Claws

    Whether you are a seasoned pitmaster or new to the BBQ, these pork shredders bring efficiency to your outdoor kitchen. Let’s break it down with two key angles:

    The BBQ Tool You Didn’t Know You Needed

    Picture this: You’ve spent hours slow-cooking a juicy pork shoulder. It’s finally ready! Now comes the fun part, shredding it for sliders, tacos, or pulled pork sandwiches.

    Using two forks for this is a thing of the past. It is a struggle to get everything pulled and simply a pain in the butt – pun intended there!

    The forks can slip, the meat is hot and can burn your fingers. But the good news is our claws to shred meat are here to relieve your frustration!

    These claws remind me of Wolverine. These pork shredders have sturdy tines that grip the meat securely. The pork butt is so tender it easily tears apart in mere seconds!

    They’re faster and more efficient than using two forks. They keep your hands safe from the hot meat. Clean up is also a breeze, simple wash with warm soapy water.

    Not Just for Pulled Pork

    But wait, there’s more! These claws aren’t just for pulled pork. They easily shred beef and chicken.

    Also, you can use these claws to lift heavy cuts from the pit, toss salads, or even shred veggies for a creative twist. They are quite versatile!

    In Conclusion

    They just make post cooking a little easier in the kitchen. If you have never had a pair of meat shredding claws you will wonder how you managed without them!

    Also, you are probably interested in pulled pork, take a look at our blog post on “How to Smoke a Pork Butt”.

  • Barbecue Seasoning for Fries – A New BBQ Snack

    Barbecue Seasoning for Fries – A New BBQ Snack

    Why BBQ Fries Are Your New Go-To Snack

    Barbecue Seasoning for fries might just be the variable your favorite snack has been missing.

    Ok, so it’s a Friday night; the kids are hungry and want something fun to eat. You have had a long day, and you are too wiped from the week to even think about firing up the smoker.

    You want that smoky, backyard BBQ flavor, but let’s be real ain’t nobody got time for that right now.

    That’s where our barbecue seasoning for fries comes in, turning your fries into a quick BBQ treat without the hassle.

    Meet Your Barbecue Seasonings for Fries

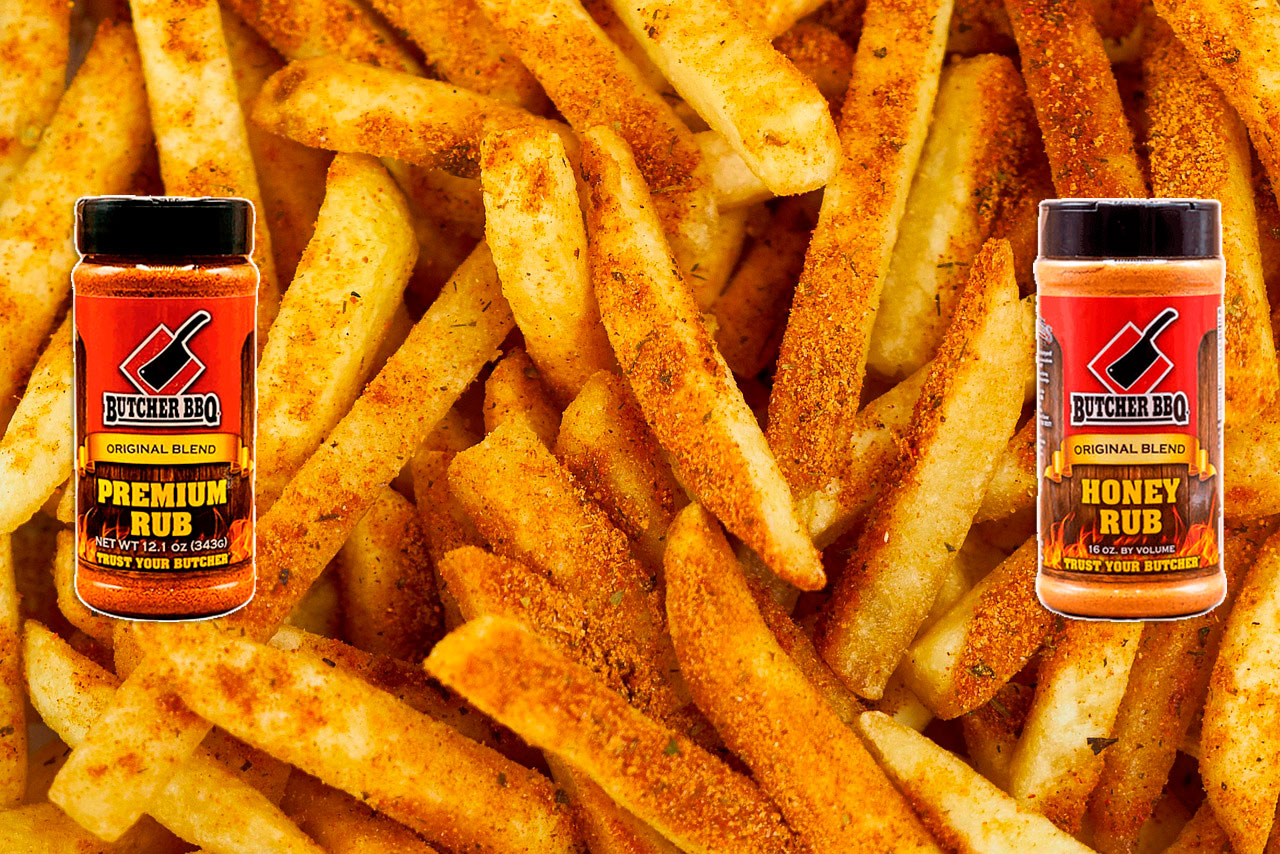
    Our Butcher BBQ Premium Rub is like that trusty old grill you have had for years; it just works. With a little sweetness and a little heat, it turns plain fries into something special. Your fries feel like they have been kissed by the smoker.

    If you’re the kind of guy who sneaks a little honey into your BBQ sauce, our Butcher BBQ Honey Rub is for you. Our honey BBQ rub is sweet, it is savory, and it will make those fries disappear faster than you can say “seconds, please.”

    These rubs aren’t just for meat, they are the perfect BBQ fry seasoning to keep things quick and easy.

    How to Fix BBQ Fries in Minutes

    Here’s how simple it is: Fry or bake your fries, sprinkle on the rub while they’re hot, and give ‘em a quick toss.

    No grill, no fuss, just great BBQ taste in every bite. Our barbecue seasoning for fries will stick to the fries with ease. You will have a perfect flavor coating without any extra work.

    Boom – BBQ French Fries with seasoning that will have the whole family thinking you spent hours perfecting the flavor.

    It’s the ultimate BBQ powder for fries for your family who might be short on time.

    In Conclusion

    Our barbecue seasoning for fries will fix your BBQ craving when you don’t have time to fire up the pit! Grab a bottle of our Butcher BBQ Premium Rub or Butcher BBQ Honey Rub and problem solved. Then let your fries do the talking.

    Trust us, your family will thank you!