Tag: DIY BBQ Rubs

  • How to Smoke Beef Back Ribs

    How to Smoke Beef Back Ribs

    So you picked up a beef rib rack and you’re thinking about firing up the smoker. Good choice. Beef back ribs don’t always get the spotlight, but when cooked right, they deliver deep beef flavor, great bark, and a satisfying bite that feels earned.

    If this is your first time cooking BBQ beef back ribs, relax. We’re going to treat these ribs like pork ribs. We will dust them with a Texas style rub, smoke, wrap, rest and let the smoker do the work. This method produces meaty beef ribs that are tender, juicy, and packed with classic barbecue flavor.

    Before you dive in, I also put together a full YouTube video that walks through this cook step-by-step on my Weber Smokey Mountain. If you like seeing the process in real time—fire setup, bark development, and tenderness checks—be sure to watch the video alongside this guide.

    What Are Beef Back Ribs?

    Beef back ribs come from the dorsal section of the rib cage, located just beneath the prime rib. When ribeye roasts or prime ribs are cut, the bones are left behind with a generous amount of meat still attached.

    Beef Back Ribs - What Are Beef Back Ribs

    Despite what some folks think, these are not a substandard cut. When smoked low and slow, barbecued beef back ribs become rich, beefy, and incredibly satisfying. They don’t eat like short ribs, they’re leaner, but when cooked properly, they are tender and full of flavor.

    Rib Prep Process

    Prepping a beef rib rack is simple and doesn’t require much trimming. For this cook, I left the fat intact and only rounded the corners for even cooking. I also left the membrane on the bone side.

    Beef Back Ribs - Trimming Beef Ribs

    Pro tip: Unlike pork ribs, it’s recommended to leave the membrane on beef back ribs. Removing it can cause the ribs to fall apart as they cook.

    Season Those Beef Back Ribs

    You can season smoked beef back ribs with just about any beef-forward rub. I often reach for Butcher BBQ Steak and Brisket Rub, which blends salt, pepper, garlic, and a hint of lemon oil.

    For this cook, I went with a simple Texas-style approach, only salt and pepper to let the beef shine.

    I don’t normally use a binder, but for this beef rib rack, I wanted to make sure the pepper adhered properly.

    1. Lightly sprinkle Worcestershire sauce over the ribs and spread it evenly.
    2. Apply freshly ground black pepper first.
      • Pepper tends to bounce off if other seasonings are applied first.
      • More pepper means better bark on BBQ beef back ribs.
    3. Finish with a generous layer of fine sea salt.
    Seasoning Beef Back Ribs

    Once seasoned, place the ribs in the refrigerator while you fire up the smoker. A rest of 45–60 minutes is ideal. This acts as a dry brine and helps build flavor.

    Prepare the Smoker

    For this cook, I’m using a 22-inch Weber Smokey Mountain, but this technique works just as well on a pellet smoker, ceramic cooker, offset, or drum.

    I set up my WSM using the Minion Method and an Arbor Fabricating charcoal basket. The smaller holes allow the charcoal to burn longer and more evenly.

    For smoke, I used three chunks of hickory. Hickory pairs perfectly with beef and gives smoked beef back ribs that classic barbecue aroma.

    I lit 12–15 briquettes in a charcoal chimney using two paraffin cubes. After about 15 minutes, they were ready to add to the smoker. Allow another 15–20 minutes for the pit to come up to temperature.

    Shoot for a grate temperature of 240–250°F.

    Let’s Get to Cooking

    Once the smoker is steady, place the beef rib rack on the grate, bone side down. At this stage, we’re building bark and letting the smoke do its job.

    Cook the ribs until the internal temperature reaches 165–175°F. This is typically where the bark has set and the ribs are ready to wrap.

    Time to Wrap the Ribs

    When the ribs hit around 175°F, wrap them tightly in two layers of butcher paper. Wrapping helps push through the stall while keeping the ribs moist.

    Wrapping Beef Ribs

    Return the wrapped ribs to the smoker and continue cooking until the internal temperature reaches 195–200°F.

    Wrapped BBQ Beef Back Ribs

    The Beef Back Ribs Are Ready to Rest

    After about 9 hours of low-and-slow cooking, these smoked beef back ribs were sitting at 198°F. Temperature matters, but the tenderness of the meat matters more.

    Using an instant read thermometer, probe between the bones. When the probe slides in with little resistance, the ribs are done.

    Remove the ribs from the smoker and let them rest, still wrapped, for at least 30 minutes. This allows the juices to redistribute and finish tenderizing the meat.

    In Conclusion

    If you’ve never cooked barbecued beef back ribs before, this is a great place to start. They’re forgiving, full of beef flavor, and incredibly rewarding when done right.

    Smoked Beef Back Ribs

    If you want to see exactly how these ribs cooked on the Weber Smokey Mountain, check out the full YouTube video (Beef Back Ribs on the 22 Inch Weber Smokey Mountain | Cold Weather Cooking) that goes with this post. Watching the process can give you extra confidence on your first cook.

    It’s your turn, fire up the pit, trust the process, and enjoy some seriously meaty beef ribs.

  • How to Smoke a Turkey Breast on a Weber Smokey Mountain

    How to Smoke a Turkey Breast on a Weber Smokey Mountain

    The unofficial “end of summer” holiday just passed and as the days are getting shorter the holidays are coming. What better way to start preparing for Thanksgiving than with a quick turkey breast for smoking! It’s great for a quick weekday meal, so let’s talk about it!

    Why Smoke a Turkey Breast

    A smoked turkey breast is a quick and easy meal for a weeknight, family gathering, or Thanksgiving. This boneless turkey breast was about 3 lbs. and the total cook time was just under 3 hours. What’s nice about smoking a turkey breast is it’s much easier than a full-size bird. It fits nicely in a small smoker, like a 14-inch Weber Smokey Mountain.

    Also, using a turkey injection, like Butcher BBQ Original Bird Booster, results in a juicy and flavorful dinner. It is less intimidating for new pitmasters. Injecting is quicker than wet brining and makes less of a mess.

    What You Need to Smoke a Turkey Breast

    • Turkey breast (bone-in or boneless) from your local grocery store.
      • I used a Butterball All Natural 3 lb. boneless turkey breast for this cook.
    • Rub – I used my go-to homemade turkey rub for this one:
      • 2 tablespoons of smoked paprika
      • 1 tablespoon of fine kosher salt
      • 1 tablespoon of ground black pepper
      • 1 tablespoon of finely ground onion powder
      • 1 tablespoon of finely ground garlic powder
      • 2 teaspoons of rosemary
      • 1 teaspoon of dried mustard
    • Optional, but highly recommended Butcher BBQ Original Bird Booster injection for added moisture and flavor.
    • Wood chunks – fruit woods work well for poultry; I used apple chunks for this cook.
    • Charcoal for the WSM – I used B and B Competition Briquettes for this cook, set up with the Minion Method.

    Smoking a Turkey Breast Step-by-Step on the 14-Inch Weber Smokey Mountain

    Now that you have all your supplies, let’s prep the bird.

    • Rinse the breast and pat it dry.
    • Mix your Butcher BBQ Original Bird Booster and inject the turkey breast.
      • I mixed half of the recommended 1/4 cup to 2 cups of water for 10 lbs. of meat.
      • Instead, I mixed 1/8 cup of Bird Booster to 1 cup of water since my turkey breast was 3 lbs.
      • Inject it with a pistol grip injector.
    • Use the injection as a binder and apply the turkey rub.
    • Let the turkey rub rest on the meat while you fire up the WSM.

    Set Up the 14-Inch Weber Smokey Mountain

    The 14 inch Weber Smokey Mountain was my first smoker. My wife purchased it for me and I learned so much with it. It is a great starter smoker for anyone who is interested in the hobby!

    Now back to the WSM setup:

    1. Fill the WSM charcoal ring with briquettes or lump charcoal.
      1. I like using the Minion Method when I cook on my Weber Smokey Mountain. The Minion Method offers a steady heat and a consistent burn.
    2. Add a couple chunks of apple wood to the charcoal basket.
    3. Add some water to the water pan; personally I like to leave it dry and just wrap it in aluminum foil for easy cleanup.
    4. We are shooting for a grate temperature of 250–275°F.

    Cooking the Turkey Breast

    Ok, now that the smoker is up to temp, grab your turkey breast and place it on the WSM’s top rack. You will want to put a temp probe to keep an eye on the internal temperature. Now, monitor the cook and when the internal temp reaches 140°F baste it with butter.

    When the internal temp of the breast reaches 160°F, pull and let it rest for 15–20 minutes. The carryover cook will bring the temp up to 165°F. Your turkey breast should have a beautiful mahogany red and brownish color to it!

    We have a video explaining how to cook a turkey breast below:

    In Conclusion

    Smoking a turkey breast is easy! It just takes some time to prepare for the cook. Once it is finished, you will have a delicious, juicy, flavorful meal for the weekday or any occasion. Butcher BBQ Bird Booster also saves you time by not brining the turkey breast for 12-24 hours.

    With a 14 inch Weber Smokey Mountain and this newfound knowledge, you will be known as “Mr. Turkey” going forward! Let’s get to cooking and please leave us a comment below on how your smoked turkey breast turned out!

  • BBQ Shrimp Rub – Add Excitement to Your Shrimp!

    BBQ Shrimp Rub – Add Excitement to Your Shrimp!

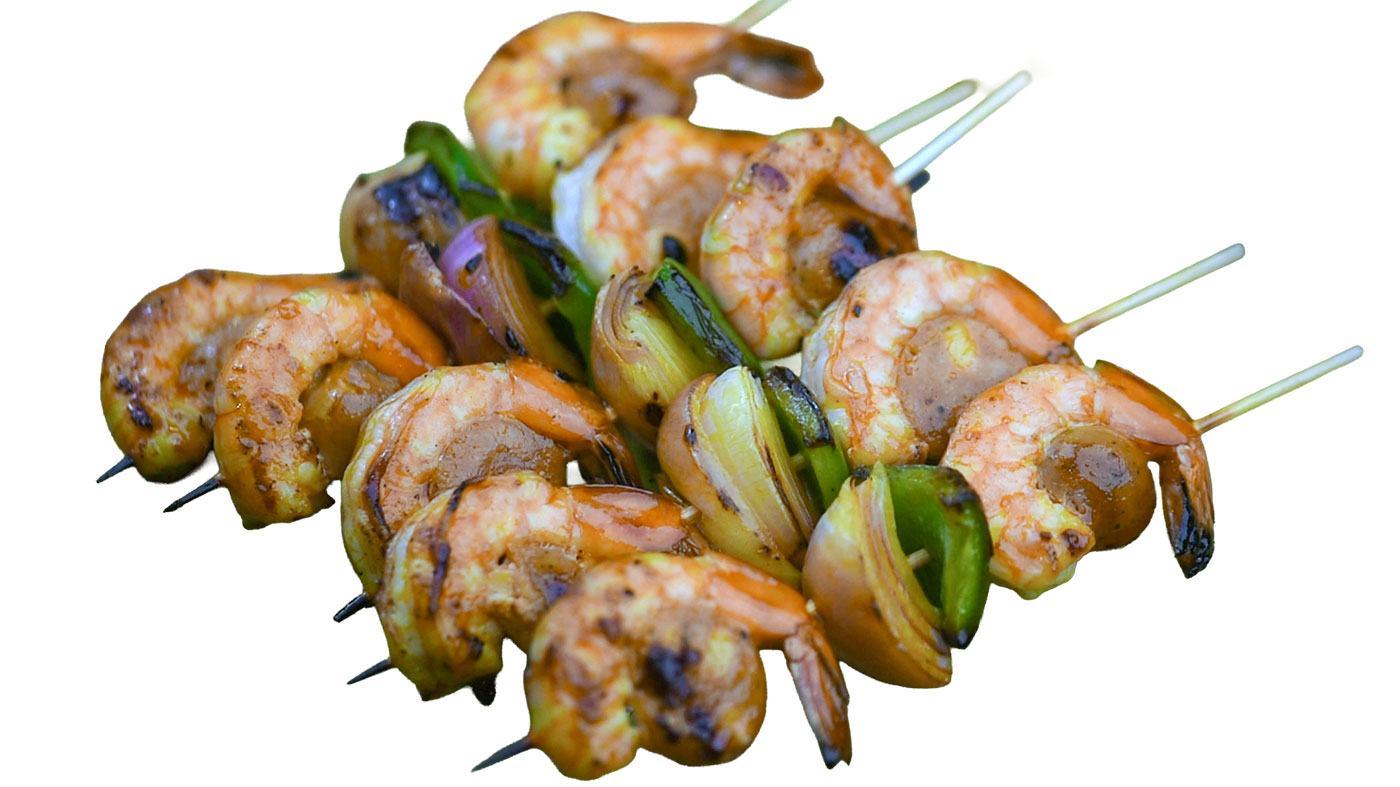
    Are you looking to add some excitement to your shrimp this summer? A BBQ shrimp rub is a simple way to spice up your shrimp kabobs. Let’s talk about how to make a rub and a rub that I use.

    Picture this: the grill is sizzling, and the sun is setting. The air fills with a spicy, Cajun-infused aroma. This is from your shrimp kabobs that are coated in a smoky dry rub for grilled shrimp!

    What Is a BBQ Shrimp Rub?

    A BBQ shrimp rub is a blend of spices and herbs applied to shrimp before cooking. The rub is designed to enhance the shrimp’s natural flavor. A dry rub for grilled shrimp typically balances smoky, savory, and slightly sweet notes. It can also have a hint of heat and a touch of Cajun spices as well.

    Common ingredients include paprika for color and smokiness, garlic and onion powders for savory depth, cayenne and black pepper for spice, some thyme for a bit of Cajun seasoning, and a touch of brown sugar for sweetness. This combination of ingredients will complement the delicate taste of shrimp without overwhelming it.

    A Simple BBQ Shrimp Rub Recipe

    Here’s a recipe to get you started:

    • 1 tablespoon paprika
    • 1 teaspoon garlic powder
    • 1 teaspoon onion powder
    • 1/4 teaspoon cayenne pepper
    • 1/2 teaspoon black pepper
    • 1 teaspoon brown sugar
    • 1 teaspoon dried thyme

    Mix these ingredients together and store your BBQ shrimp dry rub in an airtight container. This batch will coat 1-2 pounds of shrimp. However, this depends on how much flavor you want to pack in.

    How to Apply the Rub

    Start by patting your shrimp dry with a paper towel. Then, coat them evenly with the BBQ shrimp dry rub. For the best results, let the shrimp sit with the spices for about 15 minutes before cooking. This short rest allows the flavors to seep in, making every bite more delicious.

    Cooking Your BBQ Shrimp

    Cooking your BBQ shrimp is quick and easy. You don’t need hours for this; it only takes a few minutes to cook. Get your grill hot and simply cook the shrimp for 2-3 minutes per side until they’re pink and slightly charred.

    I’ll never forget the first time I made BBQ shrimp for a family gathering. The spicy, smoky aroma filled the air, and everyone loved them. The shrimp were disappearing faster than I could cook them!

    In Conclusion

    The beauty of a BBQ shrimp rub lies in its versatility. You can make the rub your own. If you like it to be a little hotter, add some more cayenne pepper. Experiment to find your perfect blend, and enjoy the bold, smoky goodness it brings to your shrimp!

    If you are short on time, no worries. We have you covered. Sometimes it’s easier to grab a bottle instead of making your own rub. I use Butcher BBQ Honey Rub. It has all the barbecue flavor I want, but with a touch of honey that is amazing on shrimp!

    Let us know in the comments below how your BBQ shrimp rub turned out!

  • How To Make A BBQ Chicken Rub

    How To Make A BBQ Chicken Rub

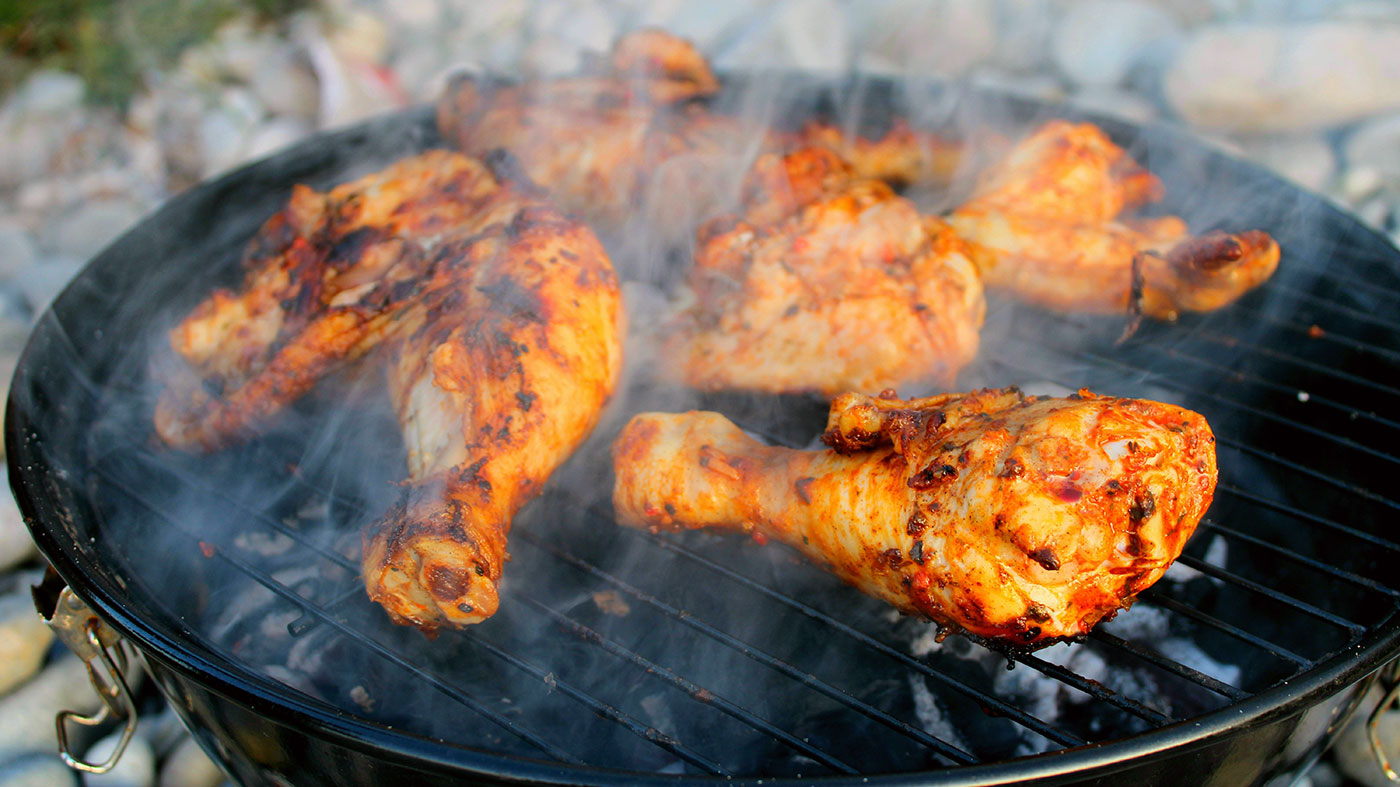
    You can make your own BBQ Chicken Rub and get cook some amazing tasting chicken in your backyard. We will show you how to create your own rub with ingredients you probably have in your kitchen. Let’s talk about it!

    BBQ Chicken Rub – Why Make Your Own

    When my wife purchased my first smoker for my birthday, I immediately started making my own rub. I found a BBQ rub recipe that has become my go-to all-purpose rub. I used it on everything from BBQ chicken to brisket. It was amazing!

    As I progressed, I decided to start experimenting by adding different seasonings. For turkey, I used this recipe but added some rosemary and thyme. That is the nice thing about making your own seasonings is you get to experiment!

    Try this BBQ chicken rub, see what you like, tweak it and make it your own! You will start to really enjoy testing and perfecting BBQ rubs. This chicken seasoning is a result of my testing.

    The BBQ Chicken Rub Recipe

    When making a chicken seasoning for smoking, you want to make sure not to add too much salt. When smoking chicken, it cooks relatively quickly vs a brisket. The chicken is a smaller piece of meat and does not cook long enough to form a bark.

    In this BBQ chicken rub recipe, I use a smaller amount of salt vs some of the other rubs I have made.

    Ok, ok I know, can you get to the recipe! No problem, the recipe is below:

    • 1 tbsp fine sea salt
    • 2 tsp cracked black pepper
    • 2 tsp smoked paprika
    • 2 tsp garlic powder
    • 2 tsp onion powder
    • 1 tsp ground mustard
    • ½ tsp cayenne pepper – optional if you want some heat!

    What Makes This a Great Chicken Seasoning

    This is a great chicken seasoning because it appeals to the kiddos as well as the adults.

    The flavor balance is quite nice, it is not sweet, it doesn’t have much or any heat, and it just works for poultry!

    Sweet rubs can work for poultry, but they are preferred for pork.

    Again, this is the fun of homemade rubs, experiment. If you like your chicken with some sweetness, add a ¼ cup of brown sugar and that should appease your sweet tooth!

    In Conclusion

    Ok, so there you have it. This is a simple rub that is amazing on chicken!

    You might also be concerned about your chicken breasts drying out. We got your back for that as well. I use Butcher BBQ Original Bird Booster to add additional chicken flavor and moisture. It’s truly amazing how delicious pairing your BBQ chicken rub with Bird Booster will do!

    Ok, it’s your turn, dust those birds and let’s get cooking!

  • BBQ Meat Seasoning – Your Guide to Flavorful BBQ

    BBQ Meat Seasoning – Your Guide to Flavorful BBQ

    When we think of BBQ meat seasoning, it takes us back to the good old days! Remember those epic backyard BBQs with buddies, brews, and the smell of the smoker cooking? The variable to making those cookouts unforgettable isn’t just the company, it was the seasoning. BBQ meat seasoning can transform a plain slab of meat into a delicious meal that will have everyone asking for seconds.

    Whether you’re firing up the grill for the family or a big get-together, finding that meat dry rub that complements your protein is the way to go. Here’s the lowdown on types, ingredients, and picking the right one for your next BBQ!

    Key Ingredients in DIY BBQ Seasonings

    Ever wondered why some BBQ tastes amazing while others fall flat? It comes down to the meat spices and rubs you use! Start with the classic BBQ ingredients: salt, pepper, paprika, garlic powder, and onion powder. These are your BBQ rub foundations.

    Want to shake things up? Toss in brown sugar for that sweet, sticky vibe or cocoa powder for a smoky twist. Add some herbs like rosemary or thyme to keep it fresh. It’s all about balance, so don’t drown the meat, just give it a boost.

    How to Choose the Right Seasoning

    Depending on the meat you are cooking, you will want to match your BBQ meat seasoning to your food. It’s easy to do, and here is a quick outline:

    • Beef pairs well with bold stuff like pepper and garlic – SPG BBQ Rub.
    • Pork digs sweet-savory combos, think paprika and sugar.
    • Chicken loves lighter, herby blends.

    If you are grilling, you should choose a rub that can take the heat; smoking works best with sugar-based mixes that caramelize slowly. These are simple choices to keep it straightforward and let the meat be the star of your dinner.

    How BBQ Meat Seasoning Really Works

    We are going to get a little nerdy about BBQ meat seasoning for a minute. Not all of your rub makes it into the meat. Smaller molecules like salt move inward through diffusion, drawing moisture back into the meat and seasoning it from the inside. Larger spice particles, like pepper, stay near the surface. This is why the outer layer of the meat carries most of the intense flavor. Letting your meat rest with the rub for at least four hours, or even overnight, gives those flavors time to settle in before cooking.

    Simple DIY All-Purpose BBQ Rub Recipe

    Ready to whip up a delicious BBQ meat rub that will make your next BBQ the talk of the neighborhood? This all-purpose meat dry rub is easy to make for anyone who loves a straightforward, no-fuss recipe. It’s versatile and pairs with beef, pork, or chicken to bring out that classic BBQ flavor we all love!

    Ingredients

    • 2 tablespoons kosher salt
    • 1 tablespoon coarse black pepper
    • 1 tablespoon smoked paprika
    • 1 tablespoon brown sugar
    • 1 teaspoon garlic powder
    • 1 teaspoon onion powder
    • 1/2 teaspoon cayenne pepper (optional, for a slight kick)

    Instructions

    1. Mix it up: Grab a small bowl and toss in all the ingredients. Stir them together with a spoon or whisk until everything’s evenly blended.
    2. Check the taste: Grab a pinch of the rub (don’t worry, it’s safe). How does it taste? Want it to be sweeter? Add a bit more brown sugar. Need more heat? Up the cayenne. Make it yours.
    3. Store it right: Pour the rub into an airtight container or a small mason jar. Keep it in a cool, dry spot, and it will stay fresh for up to six months.

    This is a delicious simple rub, but if you are short on time. We have your back. We have many BBQ Rubs and Seasonings for any meat you are planning to throw on the pit!

    In Conclusion

    So, are you ready to fire up the smoker? Slap on a BBQ meat seasoning, let it sit for 30 minutes, or overnight if you’re feeling fancy. BBQ’s about kicking back, so don’t sweat the small stuff. Light that smoker, grab your go-to cut, and let the seasoning work its magic. Here’s to epic meals and some epic nights! Smoke on!

    Also, if you are new to the BBQ scene, take a minute to read “What is a BBQ Seasoning?”

  • Brisket Homemade Rubs – Three Easy Recipes

    Brisket Homemade Rubs – Three Easy Recipes

    So, you are interested in brisket homemade rubs? Well, you have come to the right place. We love to experiment, so here are three easy to make homemade brisket rubs for your next BBQ!

    My First Brisket

    I’ll never forget my first brisket. I thought it was pretty good, but my family thought otherwise! The rub was a homemade dry rub for brisket and tasted good. My issue was I over cooked it a little, because the flat was really dry.

    Lessons learned and I continued to learn and experiment over the years. After several trial and errors my brisket these days are much juicier and flavorful.  

    What is a Brisket Rub?

    So what exactly is a brisket homemade rub? I’m glad you asked. It is a BBQ rub that can be as simple as salt and pepper, or much more complex.

    A brisket rub can also be more creative with a blend of spices and herbs. When you make the rubs yourself, your creativity can blossom.

    Each of the homemade brisket rubs below is designed to boost flavor and create that delicious outer crust we know as “bark”.

    Homemade Brisket Rub – A Few Essential Ingredients

    These are your homemade beef brisket rub foundation, mix them in equal parts for a classic base. Then experiment and build your own rub that fulfills your flavor profile!

    • Salt: Tenderizes and enhances the flavors with a dry brine process.
    • Black Pepper: Adds a sharp, earthy kick and is crucial for building bark.
    • Paprika: Brings color and a subtle smokiness (smoked paprika ups the BBQ vibe).
    • Garlic Powder: Deepens the savory profile.
    • Onion Powder: Rounds out the taste with a hint of sweetness.

    Three Homemade Brisket Rubs to Get You Started

    1. Classic Texas Rub

    • 2 tablespoons kosher salt
    • 2 tablespoons black pepper
    • 1 tablespoon paprika
    • 1 tablespoon garlic powder
    • 1 tablespoon onion powder

    Instructions: Mix in a bowl. Sprinkle this classic Texas Brisket Rub generously over the brisket and press it in. Let the rub sit for at least an hour.

    Note: Simple but bold, great for traditionalists.

    2. Sweet and Spicy Rub

    • 2 tablespoons brown sugar
    • 1 tablespoon chili powder
    • 1 tablespoon cumin
    • 1 teaspoon cayenne pepper
    • 1 tablespoon salt

    Instructions: Combine thoroughly. Apply evenly, letting it sit for an hour.

    Variation: Dial up the cayenne for extra heat!

    3. Coffee and Cocoa Rub

    • 1 tablespoon ground coffee
    • 1 tablespoon cocoa powder
    • 1 tablespoon smoked paprika
    • 1 tablespoon brown sugar
    • 1 teaspoon salt
    • 1 teaspoon pepper

    Instructions: Blend well. Coat the brisket and let it rest overnight before it goes on the pit.

    Why It Works: Coffee deepens the flavor, while cocoa adds a rich, unexpected twist.

    In Conclusion

    Ok, so there you have it, quick, simple, easy brisket homemade rubs you can make at home. The beauty of a homemade rub is the freedom to experiment.

    Start with these recipes, use your imagination and tweak them to your taste. In no time you will have a signature blend that is all your own.

    What’s your go to homemade brisket rub? Drop your recipe in the comments below, I’d love to hear your ideas!

    Side note, you may need to double or triple these recipes, depending on the size of your brisket.

    Also, I know some of us are pressed for time, no worries! We have you covered. Our Butcher BBQ Texas Bark is a simple salt, pepper, garlic rub (SPG rub). It is simple, delicious, and makes amazing bark.

    See for yourself in one of our recent blog “Texas Brisket Rub for Smoking”.

  • How to Make Your Own Rib Rub

    How to Make Your Own Rib Rub

    Around here we like to make your own rib rub every once in a while. It’s fun, easy, and you can get the kids involved as well. Let’s chat about it.

    What’s a Rib Rub Anyway?

    First, what is a pork rib rub? Well at a high level it is a mix of spices, herbs, and sometimes sugar. A homemade rib rub adds flavor, creates that crust we all love, and can even tenderize the ribs a bit.

    Rubs also add colors to your meats! The colors range from a beautiful mahogany, brown, yellows, etc. depending on the ingredients.  This makes it appealing to the eye as well as the taste buds!

    You spread the seasoning on your pork rib, let it sit prior to cooking, and the rub infuses flavor into your ribs.

    Make Your Own Rib Rub - Make Your Own Dry Rub for Ribs

    Why Bother Making Your Own Rib Rub?

    Why do you make your own dry rub for ribs instead of grabbing something off the shelf? Simple: control. You decide the heat, the sweet, the smoky, whatever your flavor profile.

    It’s easy, it is fun, and most of all you get to experiment. You can pass along your BBQ seasoning knowledge to your kids. They get involved and you have created a bonding time with them.

    You can get them excited about BBQ and share your passion for smoking their own food!

    What You’ll Need

    Here’s the lineup to make your own rib rub:

    • Brown sugar: Adds sweetness and that sticky caramelized finish.
    • Paprika: Brings color and a smoky edge.
    • Salt: Pumps up every other flavor.
    • Black pepper: Gives it some bite and builds bark.
    • Garlic powder: Savory depth, no chopping required.
    • Onion powder: More savory goodness.
    • Cayenne pepper: Optional, for a little heat.

    Pork Rib Rub Recipe

    Ready to make a dry rub for ribs? Try this recipe:

    Ingredients:

    • 1/4 cup brown sugar
    • 1/4 cup paprika
    • 2 tablespoons salt
    • 1 tablespoon black pepper
    • 1 tablespoon garlic powder
    • 1 tablespoon onion powder
    • 1 teaspoon cayenne pepper (if you want a some heat)

    Instructions:

    1. Toss everything into a bowl and mix it up. You may need to adjust the ingredients depending on how many racks of ribs you are smoking.
    2. Stash it in an airtight container until you are ready to cook some ribs.
    3. Use a shaker bottle or some way to spread the seasoning evenly across your ribs. You want to press the rub into the meat instead of rubbing the rub.
    4. Put the ribs in the fridge to chill for a minimum of 45 minutes.
    Make Your Own Rib Rub - Make a Dry Rub for Ribs

    Pro Tip

    After you apply your homemade rib rub, let it sit on the ribs for a few hours. When it comes to BBQ, we have learned not to rush anything. The longer you can let the seasoning sit the better.

    If you can leave it overnight this will add huge amounts of flavor to your ribs! This will initiate a process called “dry brining”. The salt pulls moisture out of the meat, creates a brine, then the meat sucks it back in with all the deliciousness.

    In Conclusion

    There you go a quick and simple way to make your own rib rub. This pork rib rub recipe is your entry to this process. Start with this recipe, make it your own, and have fun bonding with the kids while experimenting.

    Also, I know we all don’t have a lot of time to create our own homemade rib rubs. In that case I would recommend our Butcher BBQ Honey Rub or Butcher BBQ Cherry Rub. Both have wonderful honey and cherry flavor profiles for your pork ribs!

    We would love to hear about your experiences, so please leave us a comment below!

  • Dry Rub vs Seasoning – What is the Difference?

    Dry Rub vs Seasoning – What is the Difference?

    Dry rub vs Seasoning, “What is the difference?” This is a question that a lot of newbies in the BBQ world ask. The main difference is a BBQ rub is applied before cooking and BBQ seasoning is added during or after the cook.

    Let’s dive in a little deeper and elaborate on the difference between a Dry rub vs Seasoning.

    BBQ Rub – What is it exactly?

    A BBQ rub is a mixture of spices, herbs, salt, and sometimes sugar. Rubs are generally made up of granular or  more course spices.

    Dry Rub - BBQ Rub - Dry BBQ Rub

    The coarser texture of the dry rub helps to build a crust or “bark” on the meat. What is bark you ask?

    Bark is a flavorful crust on the exterior of the meat that forms during the smoking process. It is a result of the combination of smoke, heat, rub, rendered fat, and the Maillard reaction.

    The BBQ dry rub’s main purpose is adding flavor to the meat before cooking. The rub is applied to your meat prior to cooking. While the rub sits on the meat it starts a dry brining process.

    Guys, dry brining is what separates the novice from the pro, and it adds so much flavor to the meat!

    Dry Brining at a High Level

    • Dry brining will draw out moisture from the meat.
    • The moisture dissolves the salt to create a brine.
    • This brine is concentrated, and the brine will soak back into the meat.
    • We suggest a minimum of 45 minutes for the dry brining process to maximize the BBQ rub absorption process.
    • The longer you let the rub sit on the meat the better!

    Using a dry rub to dry brine your meat is very easy, it just takes planning and some time for the process to complete!

    What is BBQ Seasoning?

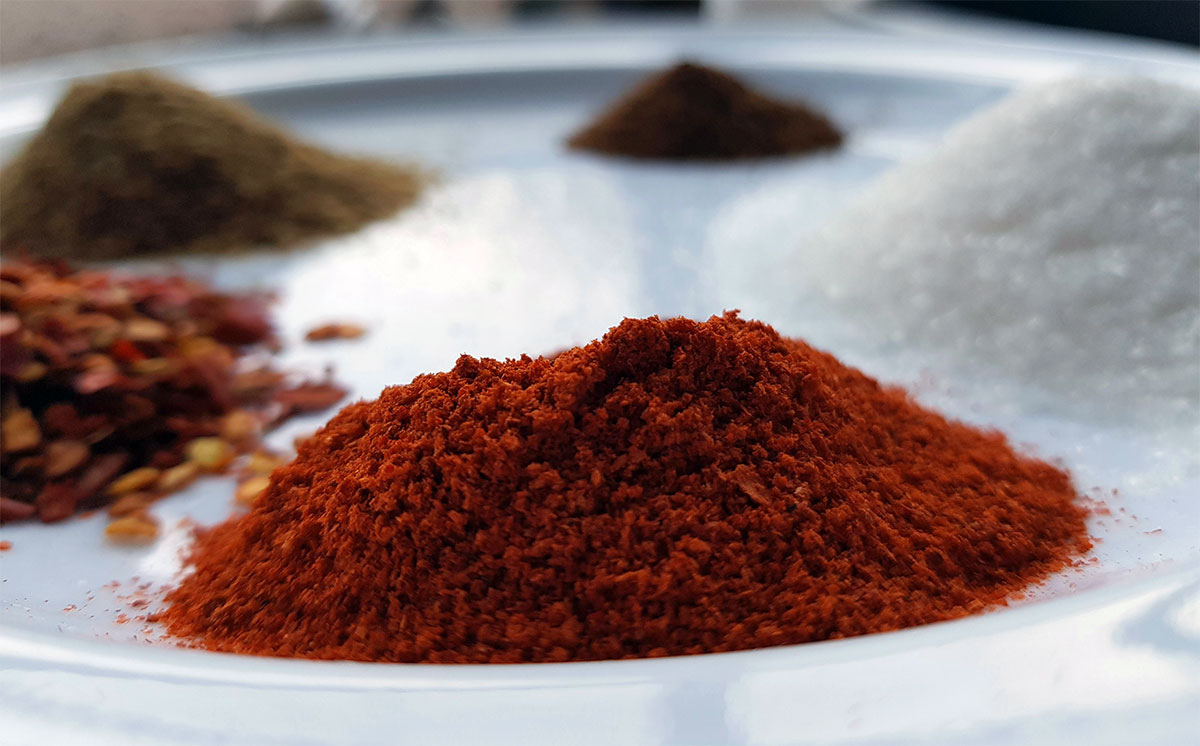
    BBQ seasoning is similar to a rub. However, it is composed of finer or more powdery ingredients than we find in a rub.

    BBQ Seasoning - Seasoning

    Barbecue seasonings are usually applied while your meat is cooking or after you have finished cooking. The best BBQ seasonings are comprised of salt, pepper, garlic powder, onion powder, and mustard powder.

    In Conclusion

    So, there you have it, Dry rub vs Seasoning in a nutshell. They both have their applications; dry rubs can be used for low and slow smoking. BBQ seasonings are more for grilling, but this is not set in stone.

    BBQ is all about experimenting, so use a BBQ seasoning or BBQ dry rub, however you please. Now, you know the difference so let’s start cooking!

    Also, we think you might be interested in make DIY BBQ Rubs! Take a minute to read “DIY BBQ Rubs – 5 Easy Homemade BBQ Rubs

  • DIY BBQ Rubs – 5 Easy Homemade BBQ Rubs

    DIY BBQ Rubs – 5 Easy Homemade BBQ Rubs

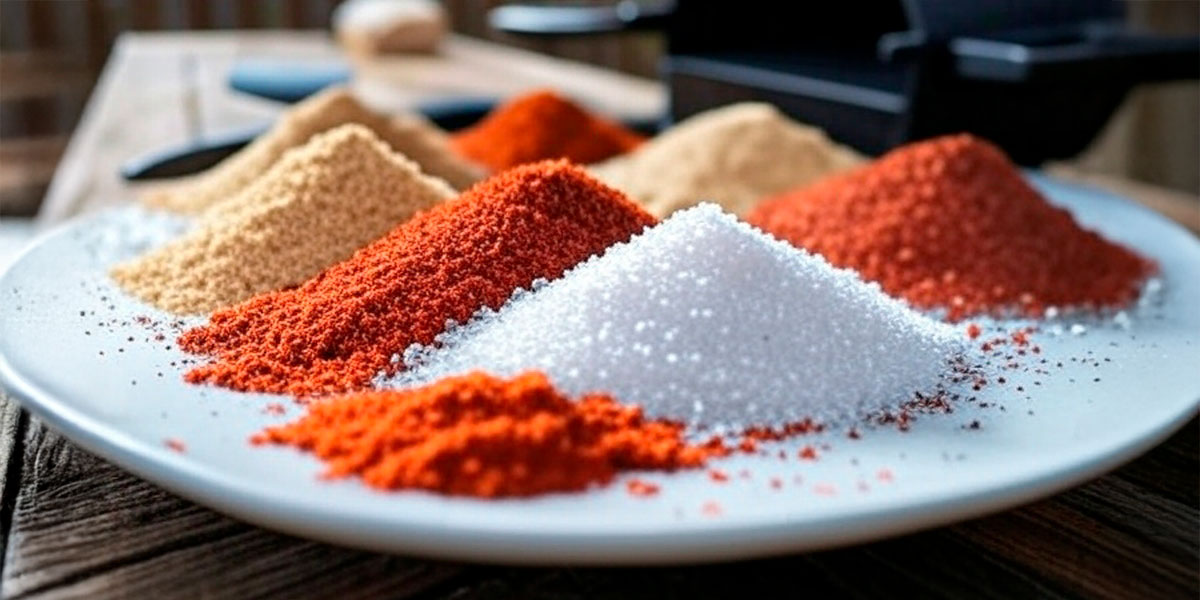
    DIY BBQ Rubs are something many pitmasters enjoy making. The process of measuring spices reminds many of us of watching our dads work their magic at weekend BBQs.

    Experimenting with different seasonings, and creating your own rubs is very rewarding. The feeling you get when everyone is enjoying the food and complementing how delicious the food tastes is like no other.

    Let’s dive into five easy homemade BBQ rubs guaranteed to add amazing flavor to your smoking sessions. These recipes focus primarily on pork ribs but work beautifully on shoulders, butts, and loins too.

    The Classic Pork Rib Rub

    This foundational DIY pork rub delivers that perfect balance of sweet, savory, and smoky. It’s reminiscent of those neighborhood cookouts where dads competed for bragging rights.

    • 1/4 cup brown sugar
    • 2 tablespoons paprika
    • 1 tablespoon kosher salt
    • 1 tablespoon black pepper
    • 1 tablespoon garlic powder
    • 1 tablespoon onion powder
    • 1 teaspoon cayenne pepper

    This DIY BBQ rub is one that smoke clings to. The sugars will caramelize beautifully during the low-and-slow process and create a gorgeous brownish-red mahogany color.

    Apply the rub liberally to your rack of ribs at least 45 minutes before you start cooking.

    Sweet Heat BBQ Seasoning

    This DIY BBQ rub delivers nostalgic flavors with a modern kick. This rub captures the essence of those 80s and 90s backyard gatherings but adds to a contemporary feeling of enjoyment.

    • 1/3 cup Turbinado sugar
    • 2 tablespoons smoked paprika
    • 1 tablespoon chili powder
    • 1 tablespoon ground cumin
    • 1 tablespoon ground mustard
    • 2 teaspoons cinnamon
    • 1 teaspoon ground chipotle

    The merger of sweetness and heat creates a delicious flavor profile for this DIY rub. Turbinado’s molasses will complement the chipotle’s smokiness on your ribs.

    We recommend this rub on baby back ribs. Apply generously and let it sit for 45 minutes before you put it on the pit.

    Smoky Memphis Style Dry Rub

    This DIY BBQ rub is for the purist who appreciates a traditional Memphis approach. This DIY dry rub for ribs is amazing and will offer an authentic BBQ flavor.

    It honors the dry rub tradition that made Memphis BBQ legendary

    • 1/4 cup paprika
    • 2 tablespoons kosher salt
    • 2 tablespoons black pepper
    • 1 tablespoon garlic powder
    • 1 tablespoon onion powder
    • 1 tablespoon celery salt
    • 1 tablespoon dried oregano
    • 1 teaspoon dried thyme

    Memphis style means no sauce needed and the spice blend creates depth of flavor without overpowering the pork.

    Apply the rub generously on your protein about 45 minutes before you plan to start cooking.

    Herb Infused BBQ Blend

    Herb infused DIY BBQ seasoning is a bit unconventional. It incorporates fresh herbs for a unique aromatic flavor profile.

    We view this herb infused rub as a refreshing departure from strictly spice based BBQ seasonings we find now days.

    • 2 tablespoons kosher salt
    • 2 tablespoons brown sugar
    • 1 tablespoon fresh rosemary (finely minced)
    • 1 tablespoon fresh thyme leaves
    • 1 tablespoon cracked black pepper
    • 1 tablespoon garlic powder
    • 1 teaspoon lemon zest

    The green profile of this BBQ rub will definitely have eye appeal. Fresh herbs add distinctive qualities that dried ingredients simply cannot match.

    This BBQ rub works wonders on pork loin roast, pork belly, and pork chops. Apply this rub generously just before smoking for the best result.

    Carolina Gold Mustard Rub

    For our final DIY BBQ rub, we are drawing inspiration from the Carolinas. A distinctive Carolina Gold Mustard Rub straight from the mustard belt!

    This is a BBQ rub that is for those seeking something different. It is beyond the conventional BBQ styles we find at most restaurants today.

    • 2 tablespoons yellow mustard powder
    • 2 tablespoons brown sugar
    • 1 tablespoon paprika
    • 1 tablespoon kosher salt
    • 2 teaspoons black pepper
    • 1 teaspoon garlic powder
    • 1 teaspoon cayenne pepper

    If you have not experienced a mustard-based rub, you are in for a treat! This rub penetrates deeply into the meat during low and slow smoking process to achieve a unique BBQ mustard flavor.

    Apply this BBQ rub generously and put it on your protein 2 or 3 hours before cooking.

    In conclusion

    Creating DIY BBQ rubs connects us to BBQ traditions while allowing our own personal expression. These five recipes are used as starting points.

    Use these rub recipes and experiment with your particular flavor profiles. Feel free to adjust the ingredients to your preference.

    Also, you may need to double or triple the rub recipes to have enough for what you are cooking.

    If you don’t have time to mix your own DIY BBQ rubs, we’ve got your back. Our premium line of craft BBQ seasonings captures some of these same flavor profiles.

    At the end of the day, just experiment and start cooking! Enjoy the warmer weather and make some DIY BBQ Rubs!