Author: Pitmaster Essentials

  • How to Smoke Beef Back Ribs

    How to Smoke Beef Back Ribs

    So you picked up a beef rib rack and you’re thinking about firing up the smoker. Good choice. Beef back ribs don’t always get the spotlight, but when cooked right, they deliver deep beef flavor, great bark, and a satisfying bite that feels earned.

    If this is your first time cooking BBQ beef back ribs, relax. We’re going to treat these ribs like pork ribs. We will dust them with a Texas style rub, smoke, wrap, rest and let the smoker do the work. This method produces meaty beef ribs that are tender, juicy, and packed with classic barbecue flavor.

    Before you dive in, I also put together a full YouTube video that walks through this cook step-by-step on my Weber Smokey Mountain. If you like seeing the process in real time—fire setup, bark development, and tenderness checks—be sure to watch the video alongside this guide.

    What Are Beef Back Ribs?

    Beef back ribs come from the dorsal section of the rib cage, located just beneath the prime rib. When ribeye roasts or prime ribs are cut, the bones are left behind with a generous amount of meat still attached.

    Beef Back Ribs - What Are Beef Back Ribs

    Despite what some folks think, these are not a substandard cut. When smoked low and slow, barbecued beef back ribs become rich, beefy, and incredibly satisfying. They don’t eat like short ribs, they’re leaner, but when cooked properly, they are tender and full of flavor.

    Rib Prep Process

    Prepping a beef rib rack is simple and doesn’t require much trimming. For this cook, I left the fat intact and only rounded the corners for even cooking. I also left the membrane on the bone side.

    Beef Back Ribs - Trimming Beef Ribs

    Pro tip: Unlike pork ribs, it’s recommended to leave the membrane on beef back ribs. Removing it can cause the ribs to fall apart as they cook.

    Season Those Beef Back Ribs

    You can season smoked beef back ribs with just about any beef-forward rub. I often reach for Butcher BBQ Steak and Brisket Rub, which blends salt, pepper, garlic, and a hint of lemon oil.

    For this cook, I went with a simple Texas-style approach, only salt and pepper to let the beef shine.

    I don’t normally use a binder, but for this beef rib rack, I wanted to make sure the pepper adhered properly.

    1. Lightly sprinkle Worcestershire sauce over the ribs and spread it evenly.
    2. Apply freshly ground black pepper first.
      • Pepper tends to bounce off if other seasonings are applied first.
      • More pepper means better bark on BBQ beef back ribs.
    3. Finish with a generous layer of fine sea salt.
    Seasoning Beef Back Ribs

    Once seasoned, place the ribs in the refrigerator while you fire up the smoker. A rest of 45–60 minutes is ideal. This acts as a dry brine and helps build flavor.

    Prepare the Smoker

    For this cook, I’m using a 22-inch Weber Smokey Mountain, but this technique works just as well on a pellet smoker, ceramic cooker, offset, or drum.

    I set up my WSM using the Minion Method and an Arbor Fabricating charcoal basket. The smaller holes allow the charcoal to burn longer and more evenly.

    For smoke, I used three chunks of hickory. Hickory pairs perfectly with beef and gives smoked beef back ribs that classic barbecue aroma.

    I lit 12–15 briquettes in a charcoal chimney using two paraffin cubes. After about 15 minutes, they were ready to add to the smoker. Allow another 15–20 minutes for the pit to come up to temperature.

    Shoot for a grate temperature of 240–250°F.

    Let’s Get to Cooking

    Once the smoker is steady, place the beef rib rack on the grate, bone side down. At this stage, we’re building bark and letting the smoke do its job.

    Cook the ribs until the internal temperature reaches 165–175°F. This is typically where the bark has set and the ribs are ready to wrap.

    Time to Wrap the Ribs

    When the ribs hit around 175°F, wrap them tightly in two layers of butcher paper. Wrapping helps push through the stall while keeping the ribs moist.

    Wrapping Beef Ribs

    Return the wrapped ribs to the smoker and continue cooking until the internal temperature reaches 195–200°F.

    Wrapped BBQ Beef Back Ribs

    The Beef Back Ribs Are Ready to Rest

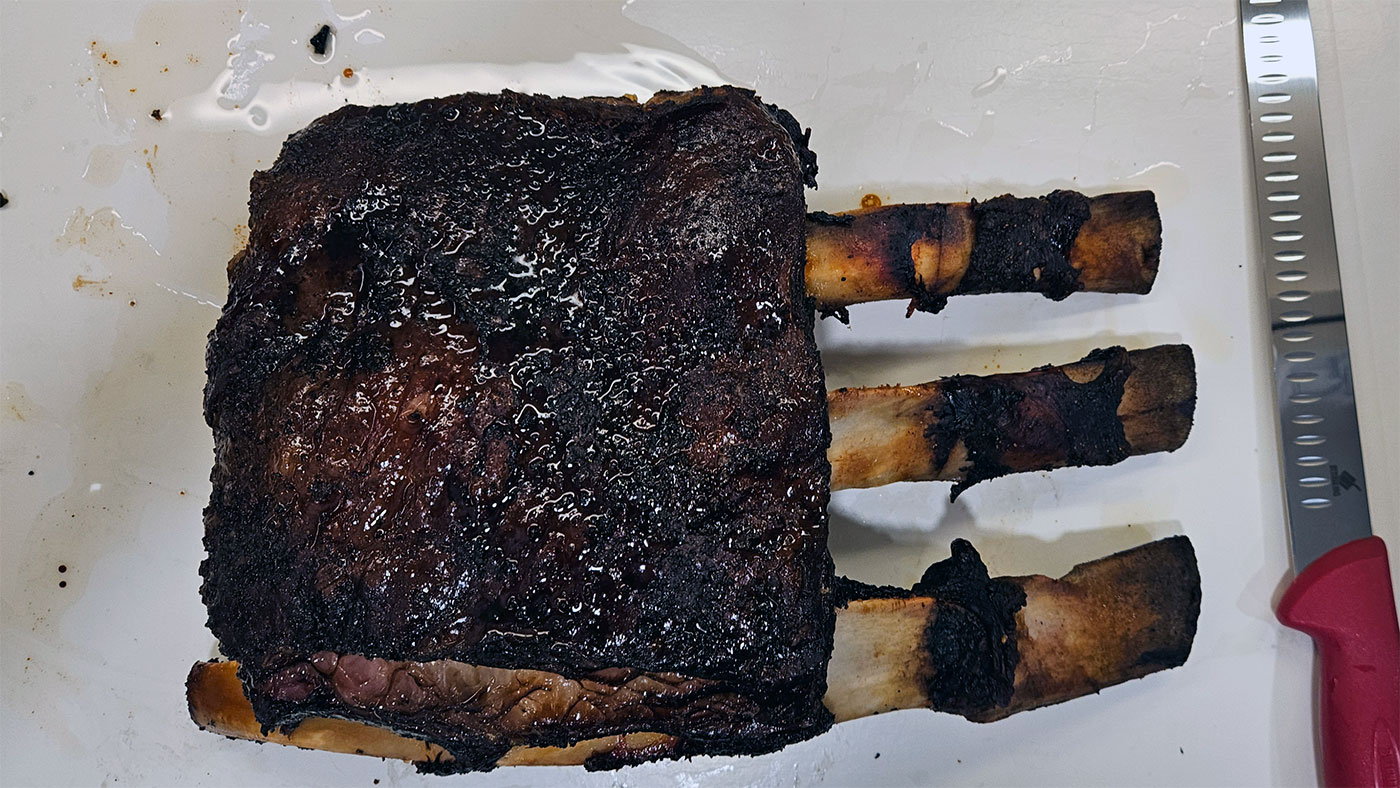
    After about 9 hours of low-and-slow cooking, these smoked beef back ribs were sitting at 198°F. Temperature matters, but the tenderness of the meat matters more.

    Using an instant read thermometer, probe between the bones. When the probe slides in with little resistance, the ribs are done.

    Remove the ribs from the smoker and let them rest, still wrapped, for at least 30 minutes. This allows the juices to redistribute and finish tenderizing the meat.

    In Conclusion

    If you’ve never cooked barbecued beef back ribs before, this is a great place to start. They’re forgiving, full of beef flavor, and incredibly rewarding when done right.

    Smoked Beef Back Ribs

    If you want to see exactly how these ribs cooked on the Weber Smokey Mountain, check out the full YouTube video (Beef Back Ribs on the 22 Inch Weber Smokey Mountain | Cold Weather Cooking) that goes with this post. Watching the process can give you extra confidence on your first cook.

    It’s your turn, fire up the pit, trust the process, and enjoy some seriously meaty beef ribs.

  • Bone-In Turkey Breast on a Weber Kettle Grill

    Bone-In Turkey Breast on a Weber Kettle Grill

    When Thanksgiving starts creeping up on the calendar, most folks start thinking about cooking a giant turkey. This requires hours spent basting, checking, and hoping the whole thing doesn’t dry out. But if you’re like me, the idea of firing up the grill for the holiday turkey just feels right.

    That’s why this year, I went with a bone-in turkey breast on the Weber Kettle. It’s simple, it’s juicy, and it’s perfect for smaller gatherings. It’s also nice because I didn’t need to wrestle with a full-size turkey. Plus, when I smoked it on the Weber Kettle, it brought back memories of Dad cooking on the kettle when I was a kid.

    Why Choose a Bone-In Turkey Breast?

    A lot of people overlook the turkey breast when it comes to Thanksgiving. But it’s one of the easiest proteins to cook for the holiday:

    • The bone helps retain moisture
    • It cooks faster than a whole bird
    • It fits perfectly on a 22-inch Weber Kettle
    • It’s ideal for families who mostly prefer white meat
    • It frees up the kitchen for stuffing, rolls, and pies
    • Save the carcass and use it for gravy or broth

    And let’s be honest, a lot of it is about presentation and impressing the in-laws by slicing into a smoky, juicy turkey breast.

    Why Choose the Weber Kettle for This Cook

    There’s something timeless about the Weber Kettle. Most of us watched a parent or grandparent flip burgers on one while wearing high socks back in the day. It’s a grill that’s as iconic as watching football on Thanksgiving Day.

    For turkey, the kettle does several things extremely well:

    • It delivers steady indirect heat
    • Allows for clean, consistent airflow
    • Makes it easy to add wood chunks for that holiday smoke flavor
    • Doesn’t require fancy equipment or accessories

    This cook is perfect for backyard beginners and seasoned pitmasters alike.

    Prep: Keeping It Simple

    I am a minimalist and kept the bone-in turkey breast recipe straightforward on this one. No need to complicate things for the Thanksgiving meal.

    Here’s the basic game plan:

    1. I purchased a 7 lb bone-in turkey breast from my local grocery store
    2. Rinse and pat the turkey breast dry
    3. Season generously with your favorite BBQ rub. I used Butcher BBQ Grilling Addiction for this one.
    4. Optional but recommended: a quick injection using Butcher BBQ Original Bird Booster for added moisture using our BBQ Injector.
    5. Let it rest while you fire up the grill

    Nothing fancy. Just honest, simple BBQ.

    Setting Up the Weber Kettle

    This part is covered visually in my YouTube video, but here’s the overview:

    • Use indirect heat
    • Set up a charcoal bank or a modified snake method. I used my Original Slow ‘N Sear paired with a Drip ‘N Griddle Pan.
    • Add 2 chunks of apple wood
    • Stabilize the kettle around 275–300°F
    • The turkey sits opposite the coals so it cooks evenly

    Smoking the Turkey Breast

    • Once the kettle is running steady:
    • Place the breast skin-side up over the indirect zone
    • Close the lid and let the Weber do the work
    • Check temps occasionally with a probe thermometer

    Your target internal temperature is 160°F in the thickest part of the turkey breast. It will carry over to 165°F while resting.

    This results in meat that’s incredibly juicy, tender, and full of flavor for the Thanksgiving meal.

    The Rest & The Slice

    Let your bone-in turkey breast rest for at least 15 minutes. This step lets all those juices settle back into the meat.

    Then comes the best part, slicing into that perfectly cooked breast. If you used Butcher BBQ Original Bird Booster, the breast will be full of juices and flavor! Your guests will thank you! It’s everything you want for a holiday meal. I provide step-by-step instructions on how to inject your turkey breast in the video below.

    Why This Is Perfect for Thanksgiving

    Cooking a bone-in turkey breast on the Weber isn’t just convenient – it’s smart:

    • It frees up oven space
    • It cooks predictably
    • It scales easily for small gatherings
    • It delivers that nostalgic, smoky flavor that reminds us of family cookouts

    Plus, leftovers make unbeatable sandwiches the next day.

    In Conclusion

    So there you have it, you now know how to smoke a bone-in turkey breast on a Weber Kettle. If you want to see the setup, the grill temps, the color, and the final slice, be sure to watch my YouTube video.

    Let us know how your Thanksgiving meal turned out if you decide to smoke a bone-in turkey breast this year!

  • Crack Burgers – The Ultimate Homemade BBQ Burger with a Twist

    Crack Burgers – The Ultimate Homemade BBQ Burger with a Twist

    If you think you know burgers, think again. Crack burgers are a step above your standard backyard patty. These burgers are juicy, flavorful, and downright addictive.

    They’re loaded with crumbled bacon, tangy ranch dressing mix, creamy sour cream, and a hint of smoky BBQ rub like Butcher BBQ Honey Rub. These burgers aren’t just meals — they’re a flavor experience for your mouth!

    What Makes Crack Burgers So Special?

    Unlike traditional smash-style burgers, crackburgers are made like classic hamburgers, but with an infusion of bold flavors inside the patty. The combination of savory bacon, creamy sour cream, and tangy ranch dressing mix keeps the beef moist while adding an irresistible depth of flavor.

    Finish it off with a touch of a burger dry rub, and you’ve got a burger that practically melts in your mouth.

    Crack Burger Recipe

    It all begins with quality ground beef, we’ll be using 1 lb of 80/20 Angus beef. However, 80/20 chuck works great too.

    Now add the flavor boosters directly to the beef:

    • 1 cup shredded cheddar cheese
    • 1/4 cup chopped bacon
    • 1/4 cup sour cream
    • 3 tbsp of your favorite BBQ rub (I like Butcher BBQ Honey Rub)
    • 3 tbsp ranch dressing mix
    • 1/2 tsp salt
    • 1/4 tsp pepper

    Mix the ingredients gently so the patties hold together. These are the key crack burger ingredients that make every bite delicious.

    Cooking Your Burgers

    Now form the beef mixture into patties. This crack burger recipe made five large patties for me. Place your crackburger patties over direct heat. I set up my Weber Kettle grill for both direct and indirect cooking.

    Sear them for 60–90 seconds on each side, then move the burgers to the indirect side of your kettle until the internal temperature reaches 160°F. Use a BBQ temp probe to monitor the internal temp of the crackburgers.

    These burgers have all the flavor inside the patty and don’t need any special cooking technique. I like to sear for a short time over direct heat and then finish the cook indirect. Add cheese at the end if you like, and toast the buns lightly for extra texture.

    Crack Burger Serving Suggestions

    Serve your crack burgers with classic sides: fries, onion rings, or a crisp salad. Their bold, smoky-sweet flavor also pairs great with a cold beer or soda.

    For an extra touch, top your grilled crack burger with fresh lettuce, tomato, or pickles. You can also keep them plain to fully enjoy the cheesy, ranch, and sour cream flavor explosion inside the patty.

    In Conclusion

    Once you try this crack burger recipe, you’ll understand why they’re called addictive. With simple ingredients, a touch of creativity, and a good grill, these burgers transform an ordinary meal into something everyone will remember.

    Grab your crack burger ingredients and fire up the Weber Kettle grill — your friends and family will thank you.

  • Smoked Boneless Turkey Breast on the Weber Kettle

    Smoked Boneless Turkey Breast on the Weber Kettle

    Remember those Thanksgivings in the ’80s, when Dad would fire up the Weber in the backyard even if snow was falling? The smell of charcoal mixing with turkey fat, the sound of that metal lid clanking—it was a simpler time. That’s the vibe I chased in my latest cook: a boneless turkey breast smoked low and slow on the Weber Kettle using the classic snake method.

    Why Go Boneless?

    If you’re a Gen X guy juggling work, kids, and the holiday rush, this one’s for you. No wrestling a 20-pound bird, no marathon cook—just a 3–4 lb. boneless turkey breast that smokes to perfection in a couple of hours. It’s the ideal size for a small Thanksgiving or weekend dinner, feeding four to six without taking over your entire day.

    And here’s the best part: boneless turkey breast soaks up flavor like a sponge, especially when you use an injection. That’s where the Butcher BBQ Pistol Grip Injector comes in—it’s built for precision and power, pushing that injection deep into the meat for juicy results every time.

    What You’ll Need

    • 3–4 lb. boneless turkey breast, thawed
    • 1 bottle Butcher BBQ Original Bird Booster for injecting
    • Butcher BBQ Pistol Grip Injector
    • My homemade turkey rub:
      • 2 tbsp smoked paprika
      • 1 tbsp fine kosher salt
      • 1 tbsp black pepper
      • 1 tbsp onion powder
      • 1 tbsp garlic powder
      • 2 tsp rosemary
      • 1 tsp dried mustard
    • Charcoal briquettes
    • Applewood chunks or chips
    • Butter or Parkay spray for basting

    Prep the Boneless Turkey Breast

    Prep is quick and easy:

    1. Pat dry the turkey breast with paper towels.
    2. Using your Butcher BBQ Pistol Grip Injector, inject the Bird Booster mixture in a grid pattern. Use about 1/8 cup of Bird Booster powder mixed with 1 cup of water for this size cut.
    3. Season evenly with the homemade turkey rub, coating all sides. Let it rest for 30–60 minutes while you set up the grill.

    That rub smells amazing! It has a hint of BBQ smoke and a touch of rosemary to keep that Thanksgiving flavor alive.

    Weber Kettle Snake Method Setup

    Now, let’s fire up the Weber Kettle using the snake method—old-school, reliable, and perfect for steady low-and-slow cooking.

    1. Line charcoal briquettes in a “C” shape around half the grill, two briquettes wide and two high.
    2. Add three applewood chunks along the snake for that sweet, mild smoke.
    3. Light 8–10 briquettes at one end of the snake and let them gradually ignite the rest as it burns around.
    4. Set a drip pan in the center and fill it halfway with water.

    You’re aiming for a grate temperature between 240–260°F (115–126°C). Once you’re dialed in, place the turkey breast in the center of the grate.

    Smoking & Basting

    Insert a probe thermometer to track internal temperature and let the Weber do its thing.

    • After 2 hours, baste with melted butter or Parkay spray to keep the surface golden.
    • Rotate the breast if needed for even color.
    • If the skin starts drying out, a quick spritz of water helps keep it moist.

    When the internal temp reaches 160°F (71°C), double-check with an instant-read thermometer. Pull it off the smoker—carryover heat will bring it up to 165°F (74°C) while it rests. Tent loosely with foil for 15–30 minutes before slicing.

    If you placed a pan under your turkey, those drippings make an incredible base for gravy.

    A Few Tips from the Pit

    1. Don’t skimp on the injection. The Bird Booster and Pistol Grip Injector combo keeps the meat juicy, even if you overcook slightly.
    2. Watch your snake. If the line breaks or dies out around the bend, relight with a few hot coals.
    3. Leftovers? Use them for smoked turkey chili or a turkey noodle soup that’ll bring back childhood memories.

    In Conclusion

    There you have it—a simple, flavorful way to smoke a boneless turkey breast on your Weber Kettle. It’s quick, low-stress, and packed with that nostalgic backyard BBQ flavor.

    Tag me if you try it and share your Weber stories, I’d love to hear how your cook turned out. Here’s to Thanksgivings that feel like home, just with a little more smoke.

  • Beef Dino Ribs – Brisket on a Stick

    Beef Dino Ribs – Brisket on a Stick

    There’s something primal about a slab of beef dino ribs sizzling away in the smoker. The name alone sounds like it belongs in a caveman’s cookbook, and honestly, that’s not far off.

    These massive bones packed with tender, juicy beef are often called “brisket on a stick.” When done right, smoked dino ribs deliver that same deep beef flavor and rich bark that brisket fans look for.

    What Exactly Are Beef Dino Ribs?

    When folks talk about dino ribs, they’re usually referring to plate short ribs. These are the big, meaty bones cut from the lower section of the cow’s rib cage. These aren’t your typical short ribs from the grocery store.

    Each bone can weigh over a pound and looks like something Fred Flintstone would throw on the grill. It’s no wonder they’re sometimes called dinosaur beef ribs. They’re packed with marbling, collagen, and pure beef flavor.

    Dino ribs rank as one of the most rewarding cuts you can smoke low and slow.

    If you’ve never cooked smoked beef dino ribs before, think of them as the love child between brisket and a prime rib roast. They’ve got the bark and smoke ring of brisket, but the tenderness and juiciness that rival any high-end steakhouse.

    The Prep: Keep It Simple

    For these big cuts, simple always wins. I start with a light trim, rounding the corners and removing any loose fat. My go-to tool is the Butcher BBQ Boning Knife for precise trimming.

    A quick coating of binder is optional. I like a little yellow mustard when I use a rub binder.

    Then I season generously with a Texas-style rub: coarse black pepper, kosher salt, and that’s it. When you’re dealing with beef this good, you don’t need to overcomplicate it.

    If you really want to add some serious flavor, try injecting the ribs with a beef brisket injection marinade. I recommend Butcher BBQ Brisket Injection — this beef injection helps add moisture and another layer of rich, beefy flavor deep into the meat.

    The Cook: Low and Slow

    I smoked these dino ribs on my Weber Smokey Mountain at 250°F using post hickory wood chunks for that classic BBQ flavor.

    These ribs will take anywhere from 6 to 10 hours of cooking time. However, this depends on thickness, so plan for a long, relaxing day by the pit. Personally, this is my happy place — some music playing, a cold drink in hand, and the Weber Smokey Mountain doing its thing!

    I don’t wrap mine until they hit around 170–175°F internal temp. Then I’ll wrap them tight in butcher paper to protect that delicious bark while they finish.

    After wrapping, the internal temp we’re looking for is around 203°F, but don’t go by temp alone. Use a temp probe and probe the sides. You’re looking for that “soft butter” feel with zero resistance. That’s when you know the dino ribs are ready!

    Once the dino ribs have finished cooking, I transfer them to a cooler to rest for about an hour.

    After the rest, I transfer the ribs to one of my Butcher BBQ Disposable Cutting Boards. It keeps cleanup simple and gives me plenty of room to work without losing any juices.

    The Payoff

    When you pick up one of these ribs, you’ll know exactly why they’re called “dino” ribs. The bone alone looks like a handle made for kings. The bark is dark and crusty, the inside jiggly and buttery tender.

    Take that first bite and you’ll get all the smokiness, salt, and beef flavor that backyard barbecue dreams are made of. Whether you call them smoked beef dino ribs or dinosaur beef ribs, one thing’s for sure — they’ll steal the show at any cookout.

    This is one of those cooks that takes you back — to when weekends meant firing up the pit, grabbing a cold drink, and letting the world slow down for a while. No apps, no notifications, just you, the smoke, and the sound of sizzling beef.

    In Conclusion

    If you’ve never smoked beef dino ribs, make this your next weekend cook. It’s the kind of meal that’ll turn a quiet afternoon into a backyard event.

    Fire up the pit, grab your favorite rub, and make some memorie, because that’s what barbecue’s all about.

  • 5 Reasons Every Pitmaster Needs a 12-Inch Butcher BBQ Granton Knife

    5 Reasons Every Pitmaster Needs a 12-Inch Butcher BBQ Granton Knife

    Every pitmaster knows the moment of truth comes after the smoke clears. This is when the blade meets the brisket. You’ve put in hours of prep, tended the fire, and now it’s time to slice your brisket. The wrong knife can tear and rip the beautiful bark you have worked so hard for. The right blade will cut through like butter.

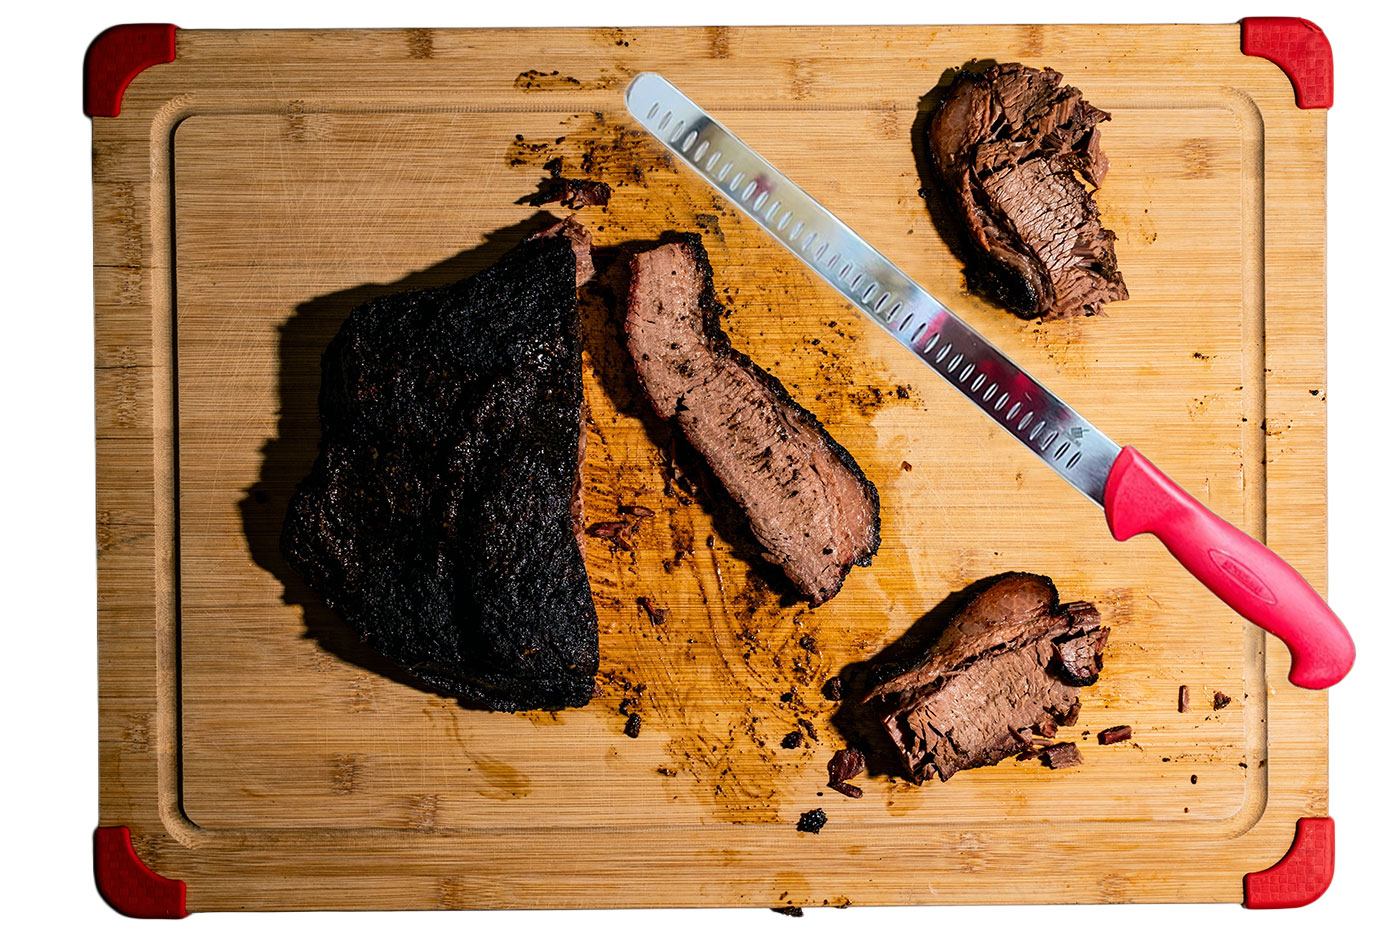
    That’s where the 12-inch Butcher BBQ Granton Knife comes in. It’s more than just a brisket slicer; it is a pitmaster essential every pitmaster needs in their collection!

    1. Clean, Effortless Slices Every Time

    The secret lies in the Granton edge. These are small oval dimples etched along the blade. The purpose of the Granton edge is to create tiny air pockets that keep meat from sticking to the knife.

    That means your brisket knife won’t tear through bark or shred your burn ends. You’ll get smooth, uniform cuts that look as good as they taste.

    2. The Power of a 12-Inch Blade

    A true pitmaster knows size matters, especially when you’re working with a full packer brisket. The 12-inch butcher knife lets you make long, single strokes through even the biggest cuts of meat.

    With a 12-inch Butcher BBQ Granton Knife you will not have to saw back and forth. The knife will cut clean through your brisket without leaving any uneven edges.

    Whether you’re carving prime rib, trimming pork loin, or slicing smoked turkey, that extra reach gives you the kind of control you can feel in your hands.

    3. Razor-Sharp Steel That Lasts

    Butcher BBQ’s 12 inch Granton knife is built from high-carbon stainless steel. This meat slicing knife for BBQ holds an edge that stays sharp through countless cooks.

    It resists corrosion and cleans up easy, even after a long day at the pit. It’s a blade designed to last for a lifetime of weekend briskets, competition turn-ins, and family cookouts.

    4. Comfort Meets Control

    A good knife should feel like an extension of your hand. The Butcher BBQ Granton Knife features a comfortable, non-slip handle that keeps your grip steady, even when things get a little greasy.

    Whether you’re trimming fat cap or carving slices for the platter, it’s balanced just right to give you total confidence in your cuts.

    5. Pro-Level Results at Home

    You don’t have to be a competition cook to slice like one. This BBQ carving knife brings that same professional precision straight to your backyard.

    Pair it with your favorite BBQ rub, some smoke rolling out of the pit, and you’ll have slices worthy of any BBQ joint. It’s the kind of knife that makes you proud to show off your work!

    Final Cut

    At the end of the day, a great brisket slicer isn’t just about sharpness, it’s about craftsmanship. The 12-inch Butcher BBQ Granton Knife combines performance, comfort, and durability in a way that elevates every cook. It’s the blade that turns hard work into artistry, one perfect slice at a time.

    So when it’s time to serve up your next brisket masterpiece, slice like a pro with the Butcher BBQ Granton Knife!

  • How to Smoke a Bacon Wrapped Tenderloin

    How to Smoke a Bacon Wrapped Tenderloin

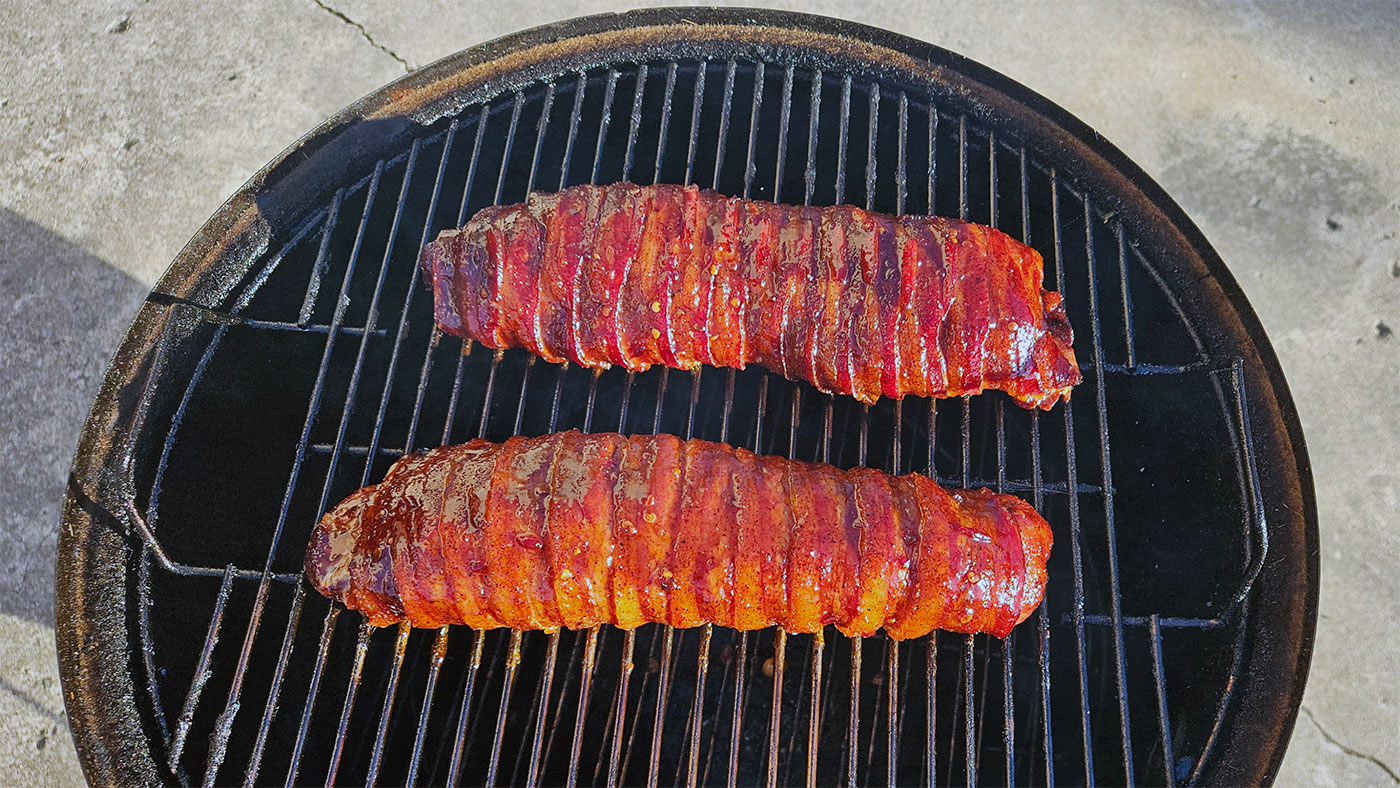
    If you have never smoked a bacon wrapped pork tenderloin, you need to change this soon! These are easy to make, and you are in for something special. It is one of those recipes that checks all the boxes: simple prep, delicious, and very tender. Your family will enjoy this recipe, because let’s be real, what doesn’t go good with bacon? The bacon locks in moisture while adding that smoky, salty deliciousness that makes this dish a backyard favorite.

    Why Bacon Wrapped Tenderloin Works So Well

    Pork tenderloin by itself is lean and mild in flavor. When you take the extra step to wrap it in bacon, it not only keeps it juicy, but adds a smoky fat cap. This fat cap then creates a flavorful crust as it cooks. The result is a bacon-covered pork tenderloin that is tender on the inside and crisp on the outside. This is a perfect combo for anyone who loves BBQ!

    Plus, this is a cook that doesn’t take all day. You can smoke a bacon-wrapped pork tenderloin in about an hour. This makes it a great option for weeknights or when you don’t want to babysit the smoker all afternoon.

    What You’ll Need to Smoke a Tenderloin

    You don’t need much for this bacon-wrapped tenderloin recipe:

    Ingredients:

    • 1 pork tenderloin (about 1 to 1½ pounds)
    • 8–10 slices of bacon
    • Your favorite BBQ rub
    • A light binder (mustard or olive oil)
    • Optional glaze (maple syrup, BBQ sauce, or honey)

    Equipment:

    • A charcoal smoker like the Weber Smokey Mountain
    • Meat thermometer
    • Toothpicks or butcher’s twine (optional)

    How to Prep the Pork Tenderloin

    1. Start by trimming any silver skin off the pork.
    2. Apply a thin layer of binder and dust it evenly with your BBQ rub.
    3. Lay out your bacon strips slightly overlapping, then set the tenderloin on top.
    4. Dust the tenderloin with a BBQ Rub; I like to use Butcher BBQ Honey Rub.
    5. Roll it up snugly so every bite gets that bacon goodness.
    6. Secure the ends with toothpicks or tie it off with twine.

    That’s it, now your bacon-wrapped tenderloin is ready for the smoker!

    Smoking Setup and Process

    Fire up your smoker and stabilize the temperature around 250-275°F. Add a couple of wood chunks; apple or cherry wood works great with pork.

    Once the smoke thins out to that light blue color, place your bacon-wrapped pork tenderloin seam-side down on the grate.

    Now sit back and let it smoke for about 20-30 minutes, then check the internal temperature. After about an hour, it should be close to 140°F. Once it hits an internal temp of 140°F, then glaze it lightly with your sauce of choice. I like to use Butcher BBQ Sweet BBQ Sauce.

    Continue to monitor the internal temperature until it reaches 145°F internally. desconfiThe glaze will set, the bacon will tighten, and it’s time to rest.

    Pull it off the pit, tent with foil, and rest for 10-15 minutes before slicing.

    Serving and Sides

    Slice your smoked tenderloin into half-inch medallions and watch those juices run!

    This bacon-wrapped tenderloin recipe pairs beautifully with smoked mac and cheese, roasted corn, or baked beans.

    If you’re lucky enough to have leftovers, they make delicious smoky tenderloin sandwiches the next day.

    Pro Tips for Perfect Results

    • Don’t rush it: Let your smoker come to temperature before adding the meat.
    • Check internal temps after 20-30 minutes: Overcooked pork tenderloin gets dry fast.
    • Use thinner bacon: It crisps better and wraps tighter.
    • Rest before slicing: This locks in all that smoky flavor.

    In Conclusion

    Smoking a bacon-wrapped pork tenderloin is one of those cooks that can be a little intimidating, but it is easy. It’s the kind of meal that reminds you why you fell in love with backyard BBQ in the first place! The smell of smoke, the sizzle of bacon, and the reward of a juicy and flavorful cooked piece of pork.

    Now it is your turn, get some pork tenderloin, wrap them in bacon, and fire up the pit! Also, let us know in the comment section below how your cook went!

  • Smoked Pig Shots on the Weber Kettle

    Smoked Pig Shots on the Weber Kettle

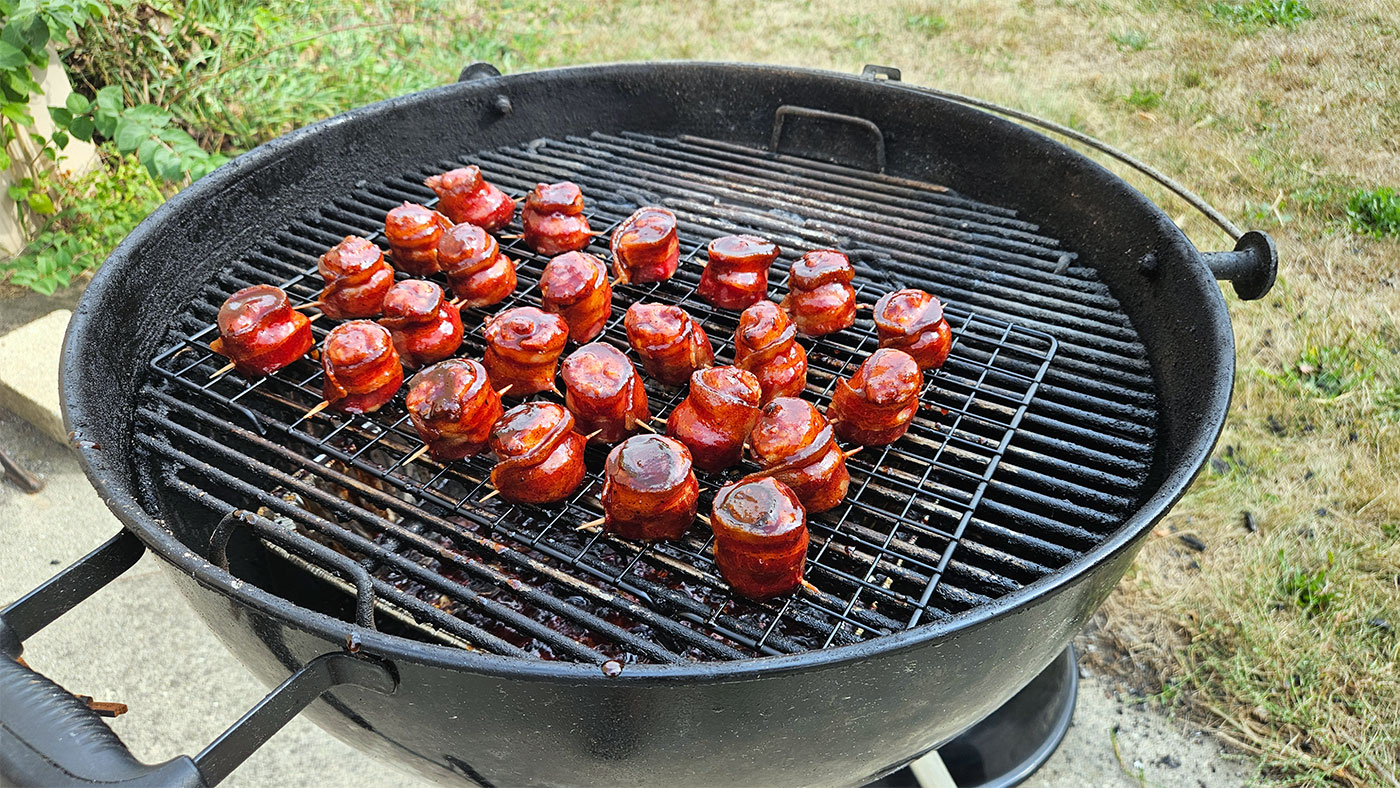
    If you’ve never heard of smoked pig shots, you’re in for a real treat. These little bacon-wrapped cups are the ultimate game day appetizers.

    Imagine a slice of smoked sausage standing tall, wrapped with a strip of crispy bacon, and filled with a rich cream cheese mixture that melts into smoky perfection.

    That’s a pig shot! And when you fire them up on a Weber Kettle grill, you’ll wonder why you didn’t try them sooner.

    What are Pig Shots?

    A pig shot is basically a bite-sized smoked sausage “shot glass” wrapped with bacon and stuffed with cheesy goodness.

    Most pitmasters use a blend of cream cheese, cheddar, and diced jalapeños, but the filling is up to you. I also like to add a BBQ rub, like Butcher BBQ Honey Rub, to the cream cheese filling for some extra honey BBQ flavor.

    I’ve also seen everything from pineapple chunks to pulled pork folded into the mix.

    The end result? A smoky, savory, slightly spicy appetizer that disappears fast at parties, tailgates, or BBQ competitions.

    Setting Up the Weber Kettle

    The Weber Kettle is perfect for smoking pig shots because it handles indirect heat like a champ.

    To set it up, place your coals on one side and a drip pan on the other. Add a small chunk of apple or cherry wood for a touch of sweet smoke.

    You’ll want to keep the grate temperature around 250–275°F. This allows the bacon to crisp up while the filling sets without burning.

    How to Make Smoked Pig Shots

    1. Grab a sharp boning knife and slice the smoked sausage into one-third- to half-inch rounds.
    2. Wrap each piece with half a strip of thick-cut bacon to form a cup.
    3. Use a toothpick to hold the bacon on the smoked sausage base.
    4. Fill the “shot glass” with cream cheese, cheddar cheese, BBQ rub, and jalapeño (or your favorite mix).
    5. Place the pig shots on the cool side of the Weber Kettle and let them smoke for about 60 minutes.
    6. For extra flavor, glaze them with BBQ sauce during the last 10 minutes.

    We also have a video showing the entire process below:

    Tips and Variations

    • Use andouille sausage for a Cajun kick.
    • Try honey glaze for sweet pig shots.
    • Keep them upright with a toothpick if needed.
    • Want a low-carb version? Skip the glaze and stick with a keto-friendly filling.

    In Conclusion

    Whether you call them bacon-wrapped pig shots, sausage shots, or just the best smoked appetizer on the Weber Kettle, one thing’s for sure: they’re a crowd favorite.

    Fire up your grill, grab some bacon and sausage, and give these pig shots a try at your next BBQ.

    Leave a comment below and let us know how your smoked pig shots turned out!

  • How to Smoke Chicken Lollipops

    How to Smoke Chicken Lollipops

    How to smoke chicken lollipops? Well let me tell you, it takes a bit of work, but it is worth it. However, there is something special about a chicken lollipop tacked with BBQ sauce!

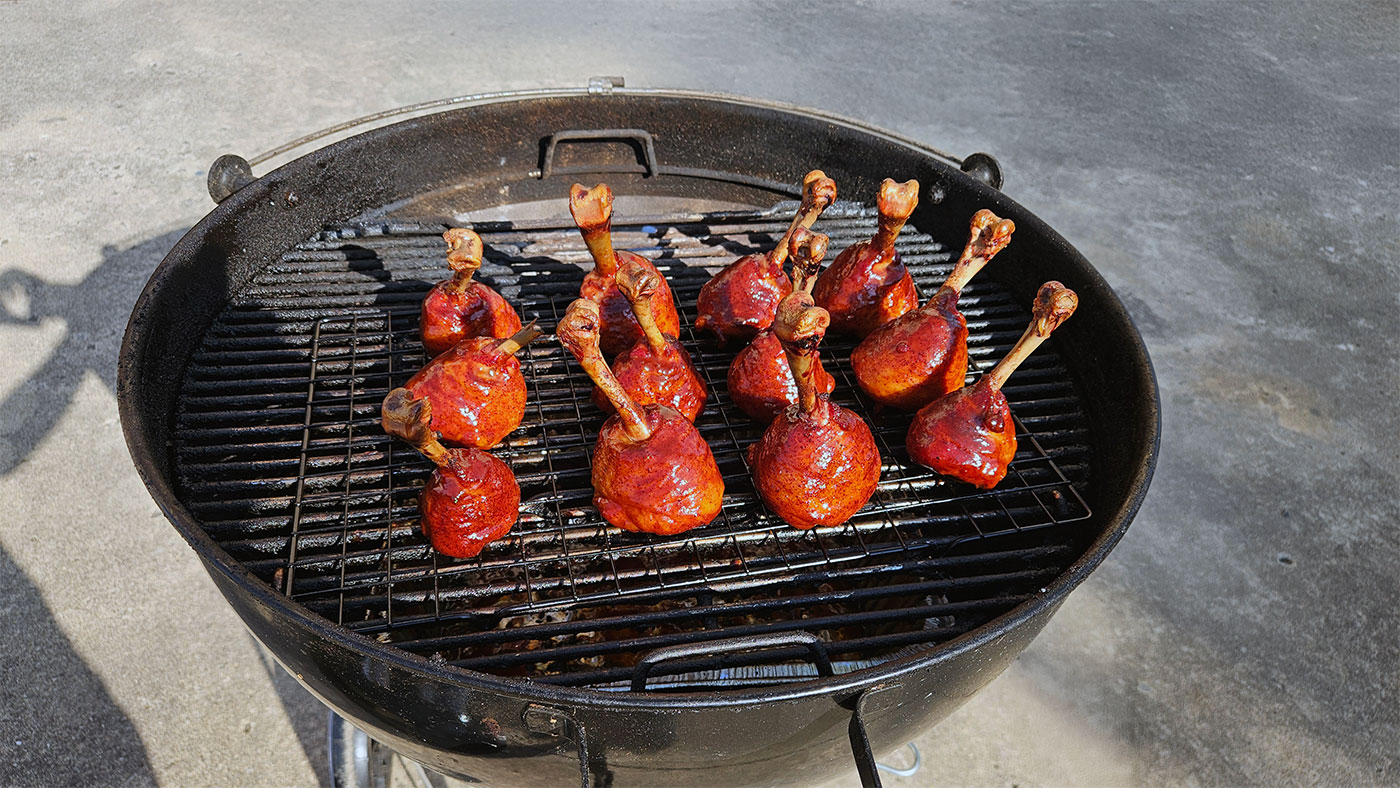
    Smoked BBQ drumstick lollipops result with a flavorful outside, juicy inside, and a beautiful presentation! It is the kind of snack that makes a great game-day treat. Let’s talk about it.

    Smoked Chicken Lollipops Recipe

    If you love smoked meat, try our smoked chicken lollipop recipe. It is quick, easy, and only requires two ingredients: a BBQ rub and a BBQ sauce.

    Here is a quick guide for smoked chicken lollipops:

    • The smoked chicken lollipop recipe I lean on uses a simple dry rub, Butcher BBQ Honey Rub.
    • A two-hour smoke at 300°F to get an internal temp around 170-175°F.
    • Dunk them in BBQ sauce, I like to use Butcher BBQ Sweet BBQ Sauce.
    BBQ Chicken Lollipop - Butcher BBQ Sweet BBQ Sauce
    • Let the sauce tack up for 10-15 minutes. Rest for another 10-15 minutes and then serve.
    Drumstick Lollipop - BBQ Lollipop

    How to Make a Chicken Lollipop

    Making chicken lollipops is easier than you think. Here is how you do it:

    • Push the skin down toward the base of the chicken leg.
    • Locate where the meat starts to taper on the bone and trim the bone to reveal a clean “handle”.
    • Pull the fat, skin, and remaining connective tissue off the knuckle of the drumstick.
    • Trim off any loose meat and tendons.
    Chicken Lollipop - Drumstick Lollipop
    Smoked BBQ Chicken Lollipops - Butcher BBQ Honey Rub
    • Rest in the fridge while you fire up the smoker.

    BBQ Chicken Lollipops That Shine

    BBQ chicken lollipops bring an amazing presentation to any tailgate for gameday. After the BBQ sauce tacks up they have a beautiful mahogany shine!

    If you prefer it spicy, add some Butcher BBQ Chipotle Rub and glaze it with a Buffalo-style BBQ sauce.

    Tips for Superb Drumstick Lollipops

    Here are some tips for making drumstick lollipops.

    Open the package, pat the meat dry, and leave it in the fridge overnight. This helps to dry out the skin a bit and make for crispier skin.

    Also, here’s a tip to keep your drumstick lollipops sitting up. Grab a chef knife and cut off a small sliver at the end of the leg. This area is just cartilage, and your knife will easily cut through it.

    Drumstick Lollipop

    In Conclusion

    Ok, so there you have it. A quick simple answer to, “How to Smoke Chicken Lollipops”. They are sure to make everyone smile, because who wouldn’t love a BBQ drumstick lollipop! They are sweet, smokey meat candy!

    So grab some chicken drumsticks, a bottle of Butcher BBQ Honey Rub, and get ready for gameday!

  • Easy Smoked Queso Dip with Sweet Chipotle Rub

    Easy Smoked Queso Dip with Sweet Chipotle Rub

    Picture this, the game is on, the crew is hanging out, and you bring out some smoked queso! Everyone starts cheering for you instead of the touchdown!

    This smoked cheese dip is rich, with melted cheese blended with breakfast sausage, smoky chilies, and a hint of spice from a chipotle rub.

    Most of us have a trusty Weber Kettle sitting on the patio. That’s all you need to whip up this creamy, smoky cheese dip. This queso dip only requires a handful of ingredients, and you will create a smoked cheese dip that will disappear faster than the first touchdown.

    Smoked Queso Dip Recipe

    Here’s the simple lineup for your winning smoked queso recipe:

    1. 1lb of breakfast sausage or ground beef
    2. 2 cans (10 oz) of Original Rotel
    3. 2 cans (8 oz) of green chilies or 1 fresh jalapeño
    4. 1–2 tablespoons of your favorite BBQ rub

    That’s it! It only consists of four ingredients and a whole lot of flavor. This smoked queso dip is simple, quick, and very tasty.

    Smoked Cheese Dip - Chipotle Rub

    How to Smoke the Cheese Dip

    This is what I call a “dump recipe.” Why? Because you literally dump everything into one pan!

    • Fire up your Weber Kettle and stabilize at 350 degrees.
    • Set up for indirect heat—charcoal on one side of the Kettle, food on the other.
    • Brown your sausage or beef, strain it, and dump it into an aluminum half pan.
    • Drain the Rotel and chilies, then dump them in too.
    • Cube up a two-pound block of Velveeta and add it to the pan.
    • Dust generously with BBQ rub. I like to use Butcher BBQ Sweet Chipotle Rub.
    • Stir everything together.
    Smoked Cheese Dip - Cheese Dip Recipe

    Slide the pan onto the grill opposite the coals. Toss in a small chunk of apple wood for some additional smokiness.

    Let it Queso Smoke

    Now comes the fun part. Let the smoked queso dip slowly bubble and take on that irresistible smoky flavor. Make sure you stir it every 15 minutes to keep it creamy.

    Smoked Queso - Charcoal Grill

    When your queso dip is halfway through the cook, I like to hit it with another light dusting of sweet chipotle rub. After 40–45 minutes, your smoked cheese dip is ready!

    Grab some chips, call in the crew, and let the game day feast begin!

    In Conclusion

    And there you have it, a foolproof smoked queso recipe made with just four simple ingredients. The combo of melty cheese, smoky chilies, seasoned sausage, and that chipotle kick is absolute gameday excellence.

    So what’s your go-to dip when the game is on? Share your favorite smoked queso dip in the comments below.