Author: Pitmaster Essentials

  • Pork Butt Rub – Four Pork Butts and Multilevel Cooking

    Pork Butt Rub – Four Pork Butts and Multilevel Cooking

    This past weekend, my backyard smelled like heaven. Four pork butts went down on my 22-inch Weber Smokey Mountain. The top and bottom grates were packed with meat seasoned in an amazing pork butt rub. Cooking that much pork at once was a challenge. However, with patience and help from my Weber Kettle, the result was delicious pulled pork. Let’s talk about it.

    The Pork Butt Rub That Brings People Together

    The star of this cook was Butcher BBQ Honey Rub. This pork butt seasoning brings a sweet note that caramelizes beautifully. It balances savory flavors with a touch of heat at the finish. Around my house, it’s the most used pork rub.

    Barbecue always turns a meal into a gathering. A pork butt rubbed with smoke and honey seasoning is irresistible. Neighbors lean over fences, kids sneak bites, and conversations start. That’s the power of a great Boston butt rub.

    This cook was for my mother-in-law’s neighborhood picnic. She reported nothing but compliments on the pulled pork. That’s the kind of feedback every pitmaster loves to hear.

    Cooking Four Pork Butts on the WSM

    Four pork butts on a WSM is not simple. Airflow, heat control, and timing matter. I fired up the WSM using the minion method. Charcoal formed the base and hickory wood chunks sat near the vents. When thin blue smoke appeared, I knew it was ready.

    Hickory and pork are old friends. That deep smoke hugs meat and pairs well with a pork shoulder rub for smoking. My target was 225–250°F at the grate. It took about an hour to stabilize.

    Pork Butt Seasoning - Pork Butt Rub for Smoking

    Prep the Pork Butts

    While the smoker came alive, I prepped the pork. Removing some of the thicker areas of the fat cap and trim anything hanging. Each butt was dusted with Butcher BBQ Honey Rub. The pork butt rub for smoking clung to the meat, forming a golden-red layer. After resting, it was time for the pit.

    Butcher BBQ Honey Rub - Pork Butt Seasoning

    At 225°F, two butts went on the bottom grate. Two more sat on the top grate. Smoke rolled steady and strong.

    Multilevel Cooking on the WSM Can Be Tricky

    Loading four butts on two grates can be tough. The Weber Kettle saved me. I used it to hold the top grate while placing two butts on the bottom. Problem solved.

    Pork Butt Rub - Charcoal Smoker

    Butts on the lower grate cook faster. I placed probes in pork butts both levels to track temps. Multilevel cooking requires patience, but the results are definitely worth it.

    Time to Wrap!

    When pork hit 155–165°F, it was wrap time. The pork butt rub had built a rich bark that was dark, mahogany, and full of flavor.

    Here’s what I added to the wrap:

    • 2 oz of BBQ sauce
    • 2 oz of Agave in the Raw
    • 2 tbsp of Sugar in the Raw
    • 2 tbsp of Butcher BBQ Honey Rub
    • Half a stick of salted butter, cut into pats

    This mixture melts into a sweet, buttery au jus sauce!

    Butcher BBQ Honey Rub - Pork Butt Wrap

    Back on the WSM

    Wrapped butts are back on the WSM. Top and bottom positions swapped, and the Weber Kettle acted as my extra hands. At this stage, it’s a waiting game. Internal temps climbed toward 195–200°F and it was time to rest.

    Time to Pull the Pork

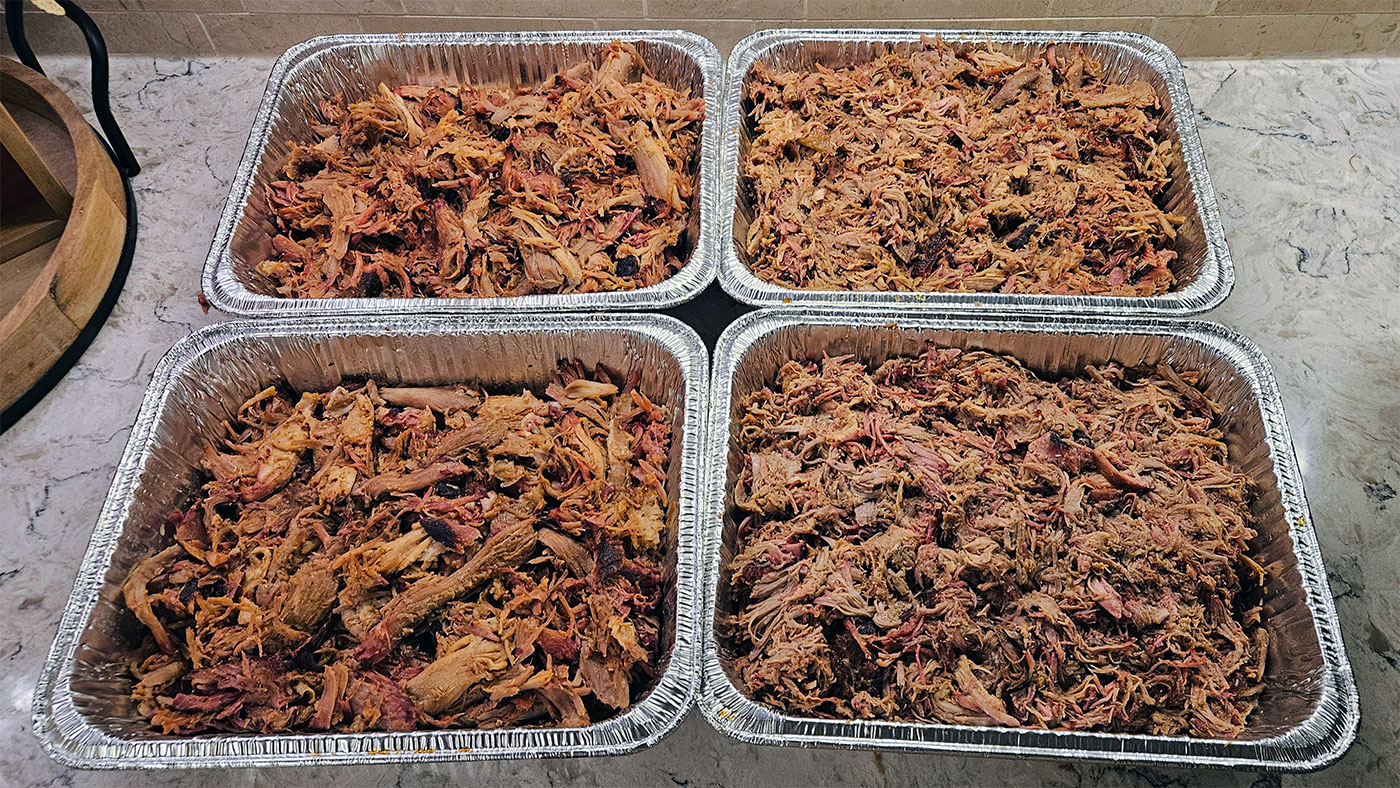
    This is the best moment. After resting, the first bone slid out clean. The Honey Rub created a beautiful mahogany crust. Each butt shredded easily into smoky strands.

    Pork Butt Rub - Clean Pork Shoulder Bone

    Ever tried pork butt bacon? It’s the thin strip of meat under the fat cap. Smoky, tender, and a pitmaster treat.

    Pork Butt Bacon

    The pulled pork tasted sweet, smoky, and savory. A good pork rub transforms pork into something unforgettable.

    What to Do with the Au Jus

    Those drippings are liquid gold, be sure to hang onto them! Use a fat separator and pour the au jus over the pulled pork, toss a few times, and now it is loaded with flavor.

    Pork Butt Au Jus

    Pro tip: Save extra au jus for pulled pork sandwiches. One drizzle takes them to another level.

    In Conclusion

    Four pork butts, one pork butt rub, and a lot of flavor later. That’s what I am talking about! Cooking on both WSM grates with kettle worked perfectly. The results were worth every minute.

    That’s barbecue. It takes time, patience, and a solid pork shoulder rub for smoking. The payoff is always more than food. It’s memories, laughter, and friends going back for seconds.

    So grab a pork butt, your favorite pork butt rub for smoking, and make memories around the smoker.

  • How to Smoke a Turkey Breast on a Weber Smokey Mountain

    How to Smoke a Turkey Breast on a Weber Smokey Mountain

    The unofficial “end of summer” holiday just passed and as the days are getting shorter the holidays are coming. What better way to start preparing for Thanksgiving than with a quick turkey breast for smoking! It’s great for a quick weekday meal, so let’s talk about it!

    Why Smoke a Turkey Breast

    A smoked turkey breast is a quick and easy meal for a weeknight, family gathering, or Thanksgiving. This boneless turkey breast was about 3 lbs. and the total cook time was just under 3 hours. What’s nice about smoking a turkey breast is it’s much easier than a full-size bird. It fits nicely in a small smoker, like a 14-inch Weber Smokey Mountain.

    Also, using a turkey injection, like Butcher BBQ Original Bird Booster, results in a juicy and flavorful dinner. It is less intimidating for new pitmasters. Injecting is quicker than wet brining and makes less of a mess.

    What You Need to Smoke a Turkey Breast

    • Turkey breast (bone-in or boneless) from your local grocery store.
      • I used a Butterball All Natural 3 lb. boneless turkey breast for this cook.
    • Rub – I used my go-to homemade turkey rub for this one:
      • 2 tablespoons of smoked paprika
      • 1 tablespoon of fine kosher salt
      • 1 tablespoon of ground black pepper
      • 1 tablespoon of finely ground onion powder
      • 1 tablespoon of finely ground garlic powder
      • 2 teaspoons of rosemary
      • 1 teaspoon of dried mustard
    • Optional, but highly recommended Butcher BBQ Original Bird Booster injection for added moisture and flavor.
    • Wood chunks – fruit woods work well for poultry; I used apple chunks for this cook.
    • Charcoal for the WSM – I used B and B Competition Briquettes for this cook, set up with the Minion Method.

    Smoking a Turkey Breast Step-by-Step on the 14-Inch Weber Smokey Mountain

    Now that you have all your supplies, let’s prep the bird.

    • Rinse the breast and pat it dry.
    • Mix your Butcher BBQ Original Bird Booster and inject the turkey breast.
      • I mixed half of the recommended 1/4 cup to 2 cups of water for 10 lbs. of meat.
      • Instead, I mixed 1/8 cup of Bird Booster to 1 cup of water since my turkey breast was 3 lbs.
      • Inject it with a pistol grip injector.
    • Use the injection as a binder and apply the turkey rub.
    • Let the turkey rub rest on the meat while you fire up the WSM.

    Set Up the 14-Inch Weber Smokey Mountain

    The 14 inch Weber Smokey Mountain was my first smoker. My wife purchased it for me and I learned so much with it. It is a great starter smoker for anyone who is interested in the hobby!

    Now back to the WSM setup:

    1. Fill the WSM charcoal ring with briquettes or lump charcoal.
      1. I like using the Minion Method when I cook on my Weber Smokey Mountain. The Minion Method offers a steady heat and a consistent burn.
    2. Add a couple chunks of apple wood to the charcoal basket.
    3. Add some water to the water pan; personally I like to leave it dry and just wrap it in aluminum foil for easy cleanup.
    4. We are shooting for a grate temperature of 250–275°F.

    Cooking the Turkey Breast

    Ok, now that the smoker is up to temp, grab your turkey breast and place it on the WSM’s top rack. You will want to put a temp probe to keep an eye on the internal temperature. Now, monitor the cook and when the internal temp reaches 140°F baste it with butter.

    When the internal temp of the breast reaches 160°F, pull and let it rest for 15–20 minutes. The carryover cook will bring the temp up to 165°F. Your turkey breast should have a beautiful mahogany red and brownish color to it!

    We have a video explaining how to cook a turkey breast below:

    In Conclusion

    Smoking a turkey breast is easy! It just takes some time to prepare for the cook. Once it is finished, you will have a delicious, juicy, flavorful meal for the weekday or any occasion. Butcher BBQ Bird Booster also saves you time by not brining the turkey breast for 12-24 hours.

    With a 14 inch Weber Smokey Mountain and this newfound knowledge, you will be known as “Mr. Turkey” going forward! Let’s get to cooking and please leave us a comment below on how your smoked turkey breast turned out!

  • Pork Tenderloin Rub – How to Smoke Pork Tenderloin

    Pork Tenderloin Rub – How to Smoke Pork Tenderloin

    The right pork tenderloin rub is the first step for those delicious pork tenderloin medallions! One of my go-to rubs is Butcher BBQ Honey Rub and this is sweet with very little heat. It is a good dry rub for pork tenderloin and it’s a great foundation for any pork dish! Let’s talk about it!

    What is a Pork Tenderloin

    First, let’s talk about what a pork tenderloin is. It is a lean strip of meat along the pig’s backbone. The tenderloin is a small muscle that is not used often by the animal and therefore it is very tender.

    This is not to be confused with a pork loin. A pork loin is a wider cut of meat from the pig’s back. This muscle is used more by the animal and it is not as tender.

    Pork Tenderloin Rub – Let’s Get to Prepping

    Ok, back to the pork tenderloin rub and prepping the meat. The tenderloin requires very little preparation. It may have some silver skin and a small amount of fat that needs to be trimmed, but that’s about it.

    How to Remove the Silver Skin

    The pork tenderloin seasoning will not be able to penetrate the silver skin so we want to remove it. Silver skin is a whitish membrane that will not render during the cook. It is rubbery and blocks smoke and rub from penetrating the meat. Also, it is not appetizing.

    It’s very easy to remove the silver skin:

    • Use a sharp boning knife and, aligning parallel with the meat, use the tip and go just under the silver skin.
    • Push your knife through and this should give you a “pull tab.”
    • Now grip the tab with one hand and use the knife in a fillet motion going down the silver skin.
    • This will remove very little meat and take the silver skin off the tenderloin.
    • You will need to repeat this process several times to get all the silver skin off.
    Pork Tenderloin Rub - Silver Skin

    Tie that Tail

    Your pork tenderloin consists of a head and a tail. The head is the thicker part and the tenderloin’s tail is the thinner area of the meat. You will want to fold the tail over and tie it with butcher twine if it is too thin. This prevents the tenderloin’s tail from being overcooked.

    Personally, I like to tie both the head and the tail with butcher twine. Sometimes the tenderloin’s head has a small piece of meat that dangles and can get overcooked as well.

    Pork Tenderloin Rub - Tenderloin Tail Tied

    Pork Tenderloin Rub – Time to Season

    Now the prep is done, it’s time to dust your tenderloin with rub. The pork tenderloin seasoning I like to use is Butcher BBQ Honey Rub. This rub pairs very well with pork! It is sweet with very little heat on the back end. Your pork tenderloin will start to turn a beautiful orange, mahogany color, and it will smell amazing!

    Simply dust your tenderloin from head to tail and let it rest for about half an hour while you get the pit ready.

    Pork Tenderloin Rub - Dry Rub for Pork Tenderloin

    Fire up the Smoker

    Ok, now to the good part. Almost time to cook that pork tenderloin! You will want to smoke your tenderloin around 250°F. Pair it with some fruit wood or fruit wood pellets. I personally like to use apple wood chunks with my pork.

    Apple wood, Butcher BBQ Honey Rub, and pork tenderloin are a match made in BBQ deliciousness!

    Let’s Get to Smoking

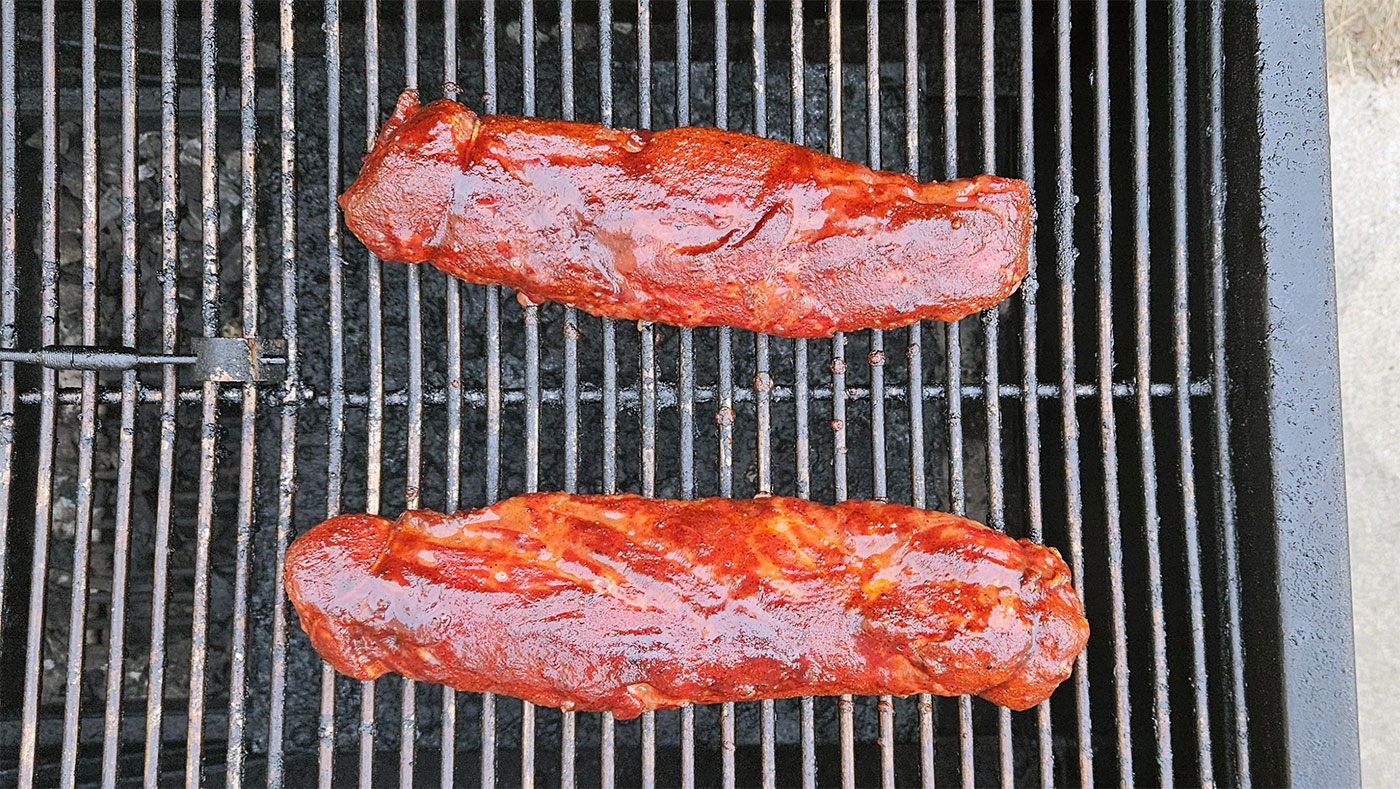
    Now put your pork tenderloin on the smoker. Let it baste in that delicious apple wood smoke for about an hour. I put a temp probe in one of my tenderloins. Around the 145°F internal temperature mark I basted the tenderloins with BBQ sauce. Wow, they looked good!
    Check it around the hour mark. You should start to see the rub set and that pork tenderloin rub will smell incredible! My tenderloins hit the 155°F internal temp after an hour and fifteen minutes. They cook relatively fast!

    Time to Rest

    Let those pork tenderloins rest! I let mine rest for about 30 minutes. During the rest, the carry-over cook will put them over 160°F internal temp.

    Let’s Eat

    Your tenderloins have cooked, rested, and now that delicious pork tenderloin rub has set. It’s time to eat! Slice them into about half-inch medallions. As you slice each medallion, they will start to release that internal moisture! You should also see a faint smoke ring and wow, I am getting hungry just thinking about them!

    In Conclusion

    Ok, there you have it, straight to the point, no fluff, how to smoke a pork tenderloin! They are easy to cook and they are a quick option for weeknights! Now it’s your turn, grab some pork tenderloin rub and let’s fire up that pit!

    Also, please leave us a comment and let us know how your pork tenderloin turned out!

  • Pork Belly Burnt Ends – A Game Day Favorite

    Pork Belly Burnt Ends – A Game Day Favorite

    Pork Belly Burnt Ends is a great option for your tailgating menu. Pork belly makes an amazing gameday burnt ends recipe, after all is what bacon comes from!

    They are easy to cook. Cube them, dust them with a BBQ rub, smoke them, and sauce them! Let’s talk about it.

    What is Pork Belly

    Pork belly, what is it? Pork belly is a boneless cut of meat from the pig’s belly. This is a delicious and flavorful piece of meat that is layered with fat for some amazing “bacon” flavor. The pork belly can be cooked by itself, cooked whole, cubed, or cured and made into bacon.

    After cubing the pork belly they become for pork belly burnt ends! That’s why you are reading this blog post, right?

    Pork Belly Burnt Ends - What Is Pork Belly

    Pork Belly Burnt Ends – What is so Special About Them

    Burnt ends are tender, juicy, and after properly cooked, they become candy pork belly! The term “burnt ends” often conjures images of a brisket burnt ends. After smoking a brisket, part of the point is cubed, tossed in BBQ sauce and BBQ rub. Put back on the pit for and the result is brisket burnt ends. I would argue that pork belly burnt ends might be a better candidate for burnt ends.

    Burnt Ends – Picture This

    Let me try to paint a picture. Think of burnt ends pork belly as being cubed, “marshmallowy” bacon chunks. These fluffy bacon chunks are smoked tossed with your favorite BBQ rub, I like to use Butcher BBQ Honey Rub. Then smoked with a fruit wood, like apple or cherry. Finally smothered in your favorite BBQ sauce for that sticky, tacky BBQ goodness we are looking for!

    Are you getting hungry, because I am!

    Pork Belly Burnt Ends – How to cook them?

    Ok, let’s get to back to the pork belly burnt ends recipe for your next tailgate:

    • Make sure your pork belly is cold.
    • Cut your pork belly into 1 inch by 1-inch square chunks.
    Pork Belly Burnt Ends - Pork Belly Cubes
    Pork Belly Cubes - Butcher BBQ Premium Rub
    • Toss your pork belly chunks so all sides are coated with rub.
    • Place your pork belly cubes on a wire grate
    Pork Belly Burnt Ends - Pork Belly Cubes on Grate
    • Let them rest in your refrigerator for about an hour.
    • Get your pit up to 250-275°F and use your favorite wood or flavored pellets.
    • Place your grate of pork belly cubes on the smoker.
    • Let them smoke for a couple of hours and then check to see how they are doing.
      • Your burnt ends pork belly should have formed a delicious brown colored bark.
      • If you probe them with a thermometer, they should have very little resistance.
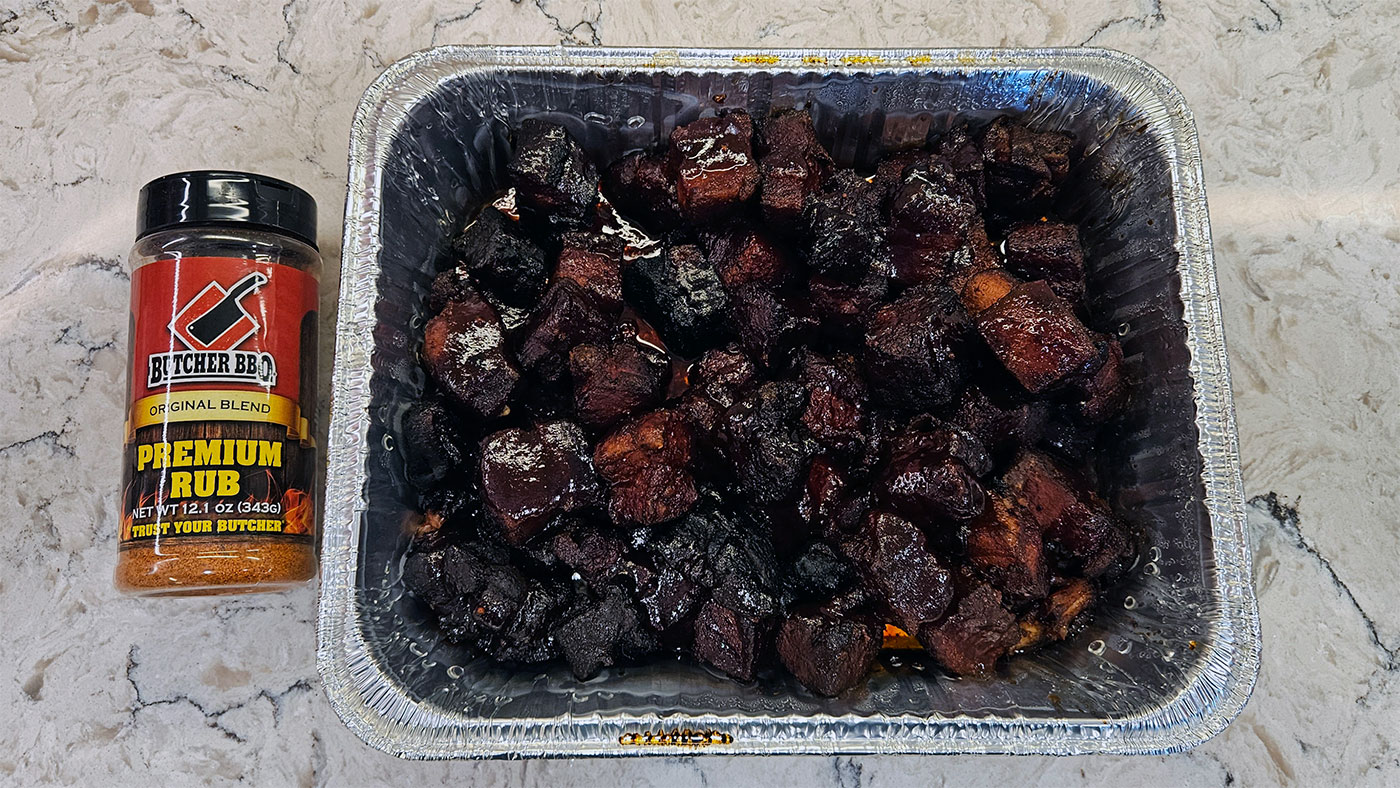
    • Place them to a new half pan and I added the following ingredients.
      • Sprinkle about a half cup of Sugar In The Raw all – or brown sugar.
      • Squeeze about 2 ounces of Agave In The Raw over your chunks – or honey.
    • Cut up a stick of butter and place them all around the pan.
    • Cover your pan of pork belly up with aluminum foil.
      • Put them back on the pit for another 30 minutes.
    • Toss your burnt ends in that delicious au jus sauce!
      • Move them from the first pan and into a second half pan.
    • Drizzle your favorite BBQ sauce and put them uncovered back on the pit for 10-15 minutes.
      • Internal temperature should be 190-200°F.
    Pork Belly Burnt Ends - Butcher BBQ Sweet BBQ Sauce
    • Let the them rest for 15 minutes!

    In conclusion

    Burnt ends pork belly are truly BBQ candy and they melt in your mouth! Combine it with Butcher BBQ Premium Rub and Butcher BBQ Sweet BBQ Sauce and “it’s good”! Now let’s get that pit fired up at your next tailgate and smoke some pork belly candy for the win!

    Oh, leave us a comment below how you did with your cook! We love to hear from our readers.

  • Smoked Hamburgers in Seven Simple Steps

    Smoked Hamburgers in Seven Simple Steps

    Smoked hamburgers, are you sure about this? When I think of hamburgers, my dad in the backyard with a Weber Kettle and some Kingsford Blue charcoal comes to mind. Hot and fast with white smoke billowing out of those four round holes in the Kettle lid.

    However, let’s talk about smoked hamburgers low and slow for a delicious twist to a backyard cookout staple!

    Why Smoked Hamburgers Are So Good

    Grilling hamburgers is always a summertime favorite for backyard get togethers. They are quick and easy to cook, relatively inexpensive, and everyone loves a grilled burger. Now, take the same hamburger, fire up the Weber Smokey Mountain, put the burgers on the smoker and everything changes!

    Add a flavorful BBQ rub, I like to use Butcher BBQ Grilling Addiction, let it dry brine, then smoke the burgers! The smoke will penetrate the hamburger just like it does with brisket or ribs! The smokey flavor paired with Butcher BBQ Grilling Addiction complement each other!

    The rub contains salt and spices, so the burgers will dry brine while you fire up the smoker. The pit will infuse them with smoke for about an hour. When they are done, you will see that gorgeous red mahogany color and taste pure beefy juiciness.

    Smoked Hamburgers - Burger on a Smoker

    Smoked Hamburger Step-by-Step Process

    Ok, follow this smoked hamburger recipe to make delicious burgers on the smoker every time:

    1. Form your hamburgers into quarter-pound or third-pound patties.
    Smoked Hamburgers - BBQ Smoked Burgers
    Smoked Hamburgers - Butcher BBQ Grilling Addiction
    • Place them in the fridge while you prepare the smoker.
    • Fire up the smoker to 225°F.
    • Smoke the hamburgers until the internal temp is around 130-135°F.
      • This takes roughly 45 minutes.
      • Use your favorite wood – I used hickory wood chunks for this cook.
    • Sear your smoked hamburgers for about 30-45 seconds on each side.
    Smoked Hamburgers - Cooking Hamburgers in a Smoker
    • Let them rest for about 15-20 minutes before serving.

    Serving Your Smoked Hamburgers

    After resting your smoked hamburgers, it’s time to start building your burger. My favorite classic combo is ketchup, mustard, and a slice of pepper jack cheese! The result is a smokey, juicy, all-American burger that will be a hit at any backyard BBQ.

    In Conclusion

    Now you know how to make smoked hamburgers. My kids have always loved regular burgers, but after trying burgers on the smoker, they ask for them all the time. It’s your turn, grab your Butcher BBQ Grilling Addiction, fire up the smoker, and get to smoking burgers. You’ll be glad you did.

  • How to Cook Beef Plate Ribs

    How to Cook Beef Plate Ribs

    Beef plate ribs are one of my favorite proteins to cook on the smoker. They have all the delicious beef flavor of a brisket, but the cook time is a bit shorter. Let’s talk about how to cook them!

    What are Beef Plate Ribs

    First, let’s talk about what beef plate ribs are. They are the thickest and meatiest ribs from the cow. You may have heard these ribs go by different names such as “Dino ribs”, “plate ribs”, and “plate short ribs” just to name a few.

    Plate ribs are cut from the short plate primal section; this is the lower belly of the cow above the flank. These beef ribs are meaty, beefy, and they have some incredible marbling! They are a fantastic beef plate ribs option for low and slow cooking on the smoker!

    What Should You Season Beef Plate Ribs With

    When preparing to cook beef plate ribs, you have many seasoning options to choose from.

    If you are a minimalist, you only need two ingredients: Salt and Pepper. This is the BBQ seasoning that many pitmasters prefer. 16 mesh pepper will attract the smoke and produce the bark, and the salt will dry brine the meat. This is an amazing flavor combination for almost any cut of beef!

    Now, I like to use Butcher BBQ Steak and Brisket Rub. This rub is a little different than the traditional Texas Style BBQ. Butcher BBQ Steak and Brisket Rub was inspired by Texas brisket with a bit of a twist – some sugar, for a touch of sweetness, and lemon pepper for a twist!

    Beef Plate Ribs - Butcher BBQ Steak and Brisket Rub

    Lemon Pepper on Beef Ribs

    You might be thinking, “Lemon pepper on beef ribs?” and if not, you are now! Hang with me. I thought the same thing, but when I first tried it, the ribs were delicious!

    My wife is not a fan of beef ribs, until I used Butcher BBQ Brisket and Steak Rub. The first time I used the rub, I told her this was a different recipe and I think she will like it. The rest is history!

    So if your wife is not a fan of Texas style beef ribs, this BBQ rub could be a winner for you as well!

    Let’s Get to Cooking

    Ok, I know, let’s get back to how to cook beef plate ribs.

    Now, beef ribs don’t require a lot of trimming. Remove any pieces that are hanging off that are thin. These are parts of the ribs that will burn up during the cook.

    Dust your ribs evenly with Butcher BBQ Steak and Brisket Rub. Then press the rub into the meat and let them sit in the fridge. I let mine rest for an hour with the rub on while I fire up the smoker.

    What Temp to Cook Beef Ribs

    The preferred method to cook beef plate ribs is “low and slow”. I shoot for a grate temp of 225°F and not going over 250°F.

    Beef Plate Ribs - Weber Smokey Mountain

    Why Low and Slow

    Beef plate ribs are meaty and thick! They have a lot of intramuscular fat, and the meat is pretty tough when raw.

    You want to slow smoke the ribs until they hit an internal temp of 165–170°F. This gives the meat time to absorb the smoke and form bark! The internal temp varies depending on if the rub has set and how the bark looks.

    I have had times where I go upwards of 175–180°F before I wrap ribs because the rub has yet to set.

    You will want to wrap these monster ribs as tight as you can in butcher paper. Put them back on the pit and let them continue to cook until the internal temp hits 200–205°F.

    Temperature is somewhat irrelevant at this point because you want that “knife in hot butter” feeling. Take a probe thermometer or toothpick and probe your beef ribs. You want very little to no resistance when probing the ribs.

    With my most recent cook, the internal temperature was 207°F before I pulled them to rest.

    Let the Beef Plate Ribs Rest

    Now the rest begins! Your beef ribs have been cooking for several hours and they need to rest for 30–60 minutes. This is an essential part of the process, as the meat cools it will absorb some of the juices around the meat.

    Beef Plate Ribs - Plate Short Ribs

    Pro tip – I like to wrap my ribs in aluminum foil and place them in a cooler. The addition of the aluminum foil around the butcher paper helps to keep all the juices contained for easier cleanup.

    In Conclusion

    So there you have it—now you know how to cook beef plate ribs. It’s very easy; it just takes some preparation and a little patience. These beef ribs cooked in roughly 6 and a half hours.

    Butcher BBQ Steak and Brisket Rub did a great job with the bark and my family loved them!

    We put together a YouTube video showing the cooking process from start to finish!

    Now it’s your turn. You have the knowledge, get the tools, and let’s get to cooking!

    Also, please post a comment below and let us know how your cook turned out! We love to hear from our customers!

  • Low and Slow Temp for BBQ – What is it?

    Low and Slow Temp for BBQ – What is it?

    Low and slow temp for BBQ can be an open-ended discussion. With that said, pitmasters talk about 225 being that magical number. Other pitmasters will say 250 is the low and slow temp they shoot for. Let’s talk about it.

    What Does it Mean to Cook Low and Slow

    Ok, let’s discuss what is low and slow BBQ. First, do you remember your first bite of brisket? I do! It was a truly amazing experience! I tried the flat and then the point. It was cooked with a rub that formed an amazing bark, and the meat was so tender and juicy! The brisket had a beefy, salty flavor with that peppery crust for true Texas BBQ.

    The process to get that brisket to that tender juicy state resulted from the low and slow temp process! When you cook a tough piece of meat, like a brisket or pork butt, at a low temperature for an extended period of time. This process is “low and slow BBQ”. It allows the low temperature to slow cook the meat, infuse smoke, and break down the intramuscular fat. The end result is a delicious, amazing meal your family will love!

    What Temp is Used for Low and Slow BBQ

    The temp used for low and slow BBQ varies from pitmaster to pitmaster. Some prefer to smoke their BBQ at 225 degrees. Others like to shoot for a grate temperature between 225-250 degrees. Still other pitmasters see 250-275 degrees as a good low and slow temp.

    Most pitmasters will agree that 300 degrees and above is not considered low and slow BBQ.

    Different cuts of meat can be smoked at different temperatures. We created a table below with a breakdown of brisket, pork butt, ribs, and chicken. This table shows the low and slow temps along with a rough estimate of how long each meat will cook:

    Low and Slow Temp - BBQ Chart

    In Conclusion

    So there you have it, the low and slow temp for BBQ is between 225-275 degrees. Different meats will take longer and need to cook at a lower temperature vs other meat that cook a little hotter and quicker.

    Also, include some BBQ rubs for your cooks. I like to use Butcher BBQ Texas Bark for beef and Butcher BBQ Honey Rub for ribs!

    Now it is your turn, fire up that smoker, and post a comment below on what your low and slow temp is for BBQ.

  • Get This Brisket Rub for Best Bark

    Get This Brisket Rub for Best Bark

    Brisket rub for best bark is what we all think about and want when it comes to smoking a brisket. That dark, black, textured bark that looks burnt, but it is far from burnt!

    I have found a rub that will do just that. It is an SPG rub with an additional ingredient that really forms the bark. Let’s talk about it.

    Brisket Rub for Best Bark - Brisket Bark

    What is the Brisket Rub for Best Bark

    Smoking a brisket can be intimidating for any pitmaster when they first start out. We all want that dark, crispy bark we see the pros cook.

    However, determining what to use for a rub can be intimidating. Should you only use salt and pepper, and if so, how much salt is too much? Do you put the pepper on first, and if so, how much?

    Should you use a store-bought rub, or should you create your own brisket rub recipe for good bark? These are all questions that every pitmaster thinks about at one time or another.

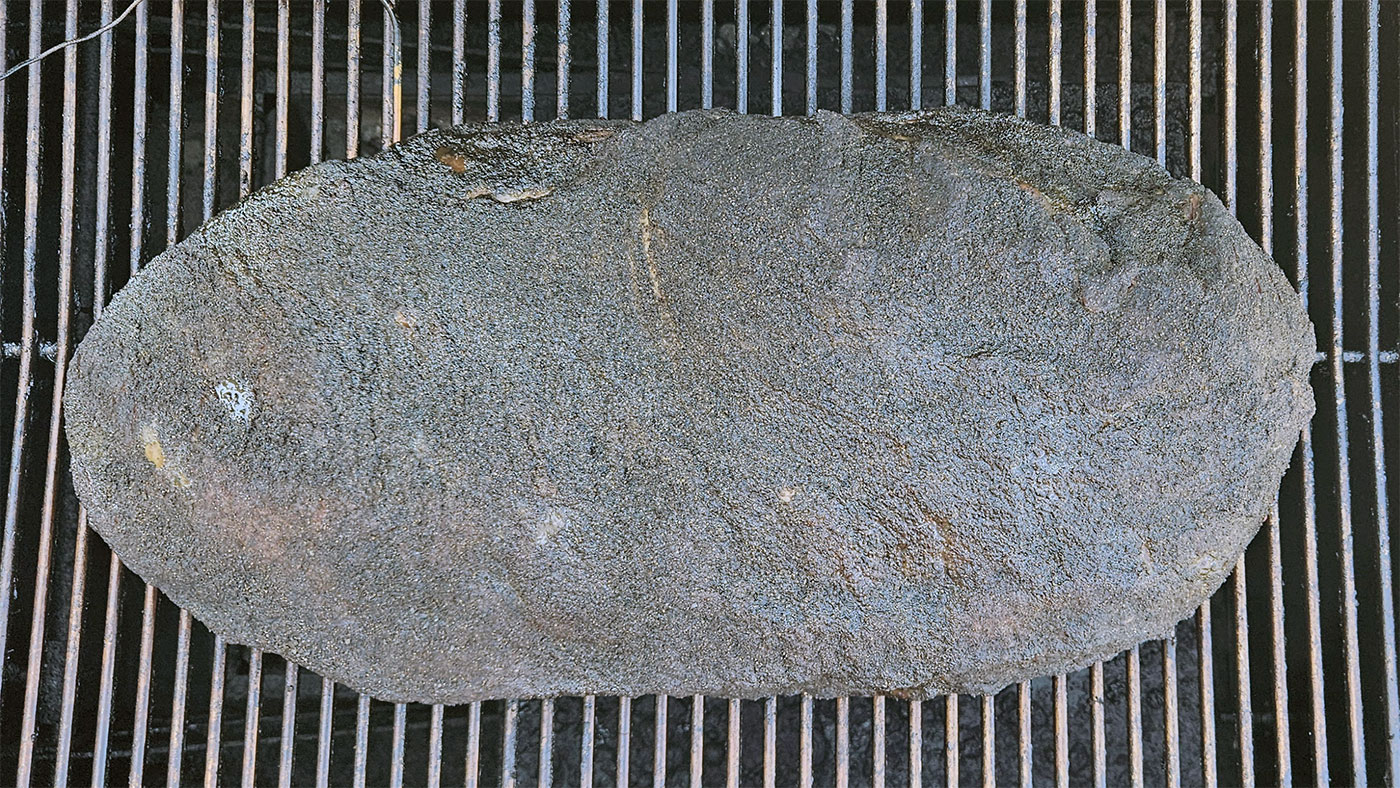
    I have found a beef brisket rub for the best bark. It is Butcher BBQ Texas Bark! I have used a lot of rubs in my time, but this one created the most bark I have seen on a brisket.

    What is in This Brisket Rub

    This brisket rub is an SPG rub, but it has one additional ingredient that really forms the bark. That ingredient is activate charcoal.

    I know what you are thinking: why would you put activate charcoal in a rub? Well, David Bouska, the owner of Butcher BBQ, knows a thing or two about BBQ.

    David is a 2 Time World BBQ Champion, has won over 100 Grand and Reserve Championships, and was inducted into the Oklahoma BBQ Hall of Fame!

    David went to work trying to create a beef brisket rub that would produce the best bark for a brisket, and he did just that.

    How to Apply the Brisket Rub

    Applying the brisket rub for best bark is easy to do. The rub comes in its own shaker bottle. Simply pop the top, hold it about 2-4 inches above the brisket, and shake the rub evenly onto your brisket.

    Brisket Rub for Best Bark - Brisket Rub Shaker

    If you are smoking a full packer brisket, it can handle a lot of rub! Apply liberally and press the rub into the meat.

    Brisket Rub for Best Bark - Press the Brisket Rub

    Let the rub rest for at least an hour before you start cooking. If time allows, let the rub sit on the brisket overnight. The longer, the better.

    How Does Your Brisket Look

    Butcher BBQ Texas Bark creates some amazing bark! The combination of pepper and activate charcoal grab and hold onto the smoke to create the brisket bark.
    You should get this brisket rub because it will create the best bark on your brisket!

    The color is just what you see on BBQ championships!

    Another reason why you should get this rub is that it locks in moisture! The salty goodness, combined with the beefy flavor, well, let me just say you should be prepared for a flavor explosion!

    Brisket Rub for Best Bark - Butcher BBQ Texas Bark

    In Conclusion

    Ok, so there you have it. This is why you should get our brisket rub for best bark! It creates some amazing bark, it locks in moisture, and it is delicious!

    I pair it with Butcher BBQ Liquid Brisket Injection, and that is a fantastic combination of beefy flavor, moisture, and presentation!

    So get a bottle of Butcher BBQ Texas Bark and get that pit smoking!

  • How to Cook a New York Strip Steak

    How to Cook a New York Strip Steak

    How to Cook a New York Strip Steak? Very simple, dry brine, fire up the grill, short sear, and then indirect cooking. When you think about grilling, one of the steaks that comes to mind is a New York Strip steak. Let’s talk about how to cook it!

    What is a New York Strip Steak

    First off, let’s talk about what a New York Strip Steak is. A New York Strip or “strip steak” is a cut of beef taken from the short loin section of the cow.

    It is a delicious and tender cut of meat because it is located near the tenderloin. It has marbling throughout, making it a very popular cut of meat for steak lovers!

    How to Prepare a New York Strip Steak

    When it comes to preparing a New York Strip you have many options. One of my favorite ways to prepare for a cook is to dry brine the steak. Dry brining was a true game changer for me. Simply dust some salt on both sides of your steak and let it rest in the fridge for about an hour. The longer the salt sits on the steak the better. That’s about as simple as it gets. After an hour, add some pepper and it is ready to cook!

    Seasoning for Grilled Steak

    In addition to dry brining your strip steak, I also like to add some additional seasoning when grilling my steaks. One of my go-to steak seasonings is Butcher BBQ Grilling Addiction! This is a delicious seasoning for grilled steak! This grilled steak rub adds some garlic and onion flavor that helps to bring out the grilling flavors on the strip steak! Feel free to add whatever your favorite steak seasoning is at this point.

    How to Cook a New York Strip Steak - Grilled Seasoning for Steaks

    Time to Cook the Strip Steak

    Ok, we have it seasoned, rested, now it’s time to cook! In this example we will be firing up our Hasty Bake Legacy grill. Grilling a steak over charcoal is one of the best ways to cook a steak!

    Add the hot coals to one side of your grill. This will leave a “cool” side for indirect cooking after we sear. Get your grill ripping hot, 400-500 degrees, and put your strip steak over the hot coals.

    As you place the steak on the hot grill grate, the sizzling sound erupts! The juices from the steak create that all so familiar “charcoal grill” aroma!

    How to Cook a New York Strip Steak - Steak on Grill

    If your steaks are over an inch thick, let them sear for 60-90 seconds on each side.

    After searing you should have beautiful grill marks on each side of your New York Strip. This is when they are ready for the indirect side of the grill.

    How to Cook a New York Strip Steak - Grilled Steak Sear Marks

    Use a probe thermometer to periodically monitor the internal temperature. I shoot for a medium-rare with an internal temperature around 130-135. If you like your steaks medium, you will want to be around 140 internal temperature.

    How to Cook a New York Strip Steak - Steak Temperature

    Let Them Rest

    After your New York Strip steaks are finished cooking they should have a beautiful red “smoke” color on the tips. This is where the charcoal really infuses flavor during the cook!

    New York Strip Steak - Grilled Steak Rub

    Place them on a cooking tray and tent them with foil. Let them rest for 15-20 minutes then you are ready to start eating!

    In Conclusion

    Now that is how to cook a New York strip steak. It’s very simple, and they cooked in about 30 minutes. The strip steaks come out juicy, tender, full of flavor! This makes for a lot of smiles around the dinner table!

    So there you go! Now it’s time to give this a try, you will be happy you did! Also, we love to hear from our readers, please add a comment below and let us know how your strip steaks turned out!

  • What is a Boning Knife?

    What is a Boning Knife?

    What is a boning knife? Great question! It is a specialized knife with a narrow, flexible blade designed for removing bones, fat, and connective tissue from meat.

    If you are new to cooking BBQ, you have likely heard about a boning knife. It is a knife many pitmasters use, so let’s talk about it!

    What is a Boning Knife Used For

    What is a Boning Knife - 6 Inch Boning Knife

    Picture this, it is a gorgeous Saturday morning, it’s early, and you are preparing to cook a pork butt. The sun is shining, the birds are chirping, your pit is smoking, and the backyard is filled with our favorite wood smoke.

    Now it’s time to trim that pork shoulder. The tool you are looking for is a boning knife. This knife is part of your BBQ arsenal and for good reason.

    A boning knife is used by pitmasters to remove excess meat that will potentially burn up during the cook. It is also used toremove fat. Now, we all know that fat is flavor, but too much fat will not render down.

    With a pork butt, for example, the fat cap usually comes quite thick from the butcher. Use it to remove the fat down to about a quarter of an inch. A quarter inch of fat will render down enough to be delicious after pulling the pork!

    Why Get a Boning Knife

    Ok, so one main reason to get a boning knife is for meat preparation. However, these knives also have some additional benefits. They have flexible but stiff blades. This helps with removing any thick fat or cartilage from your meats.

    Additional benefits and features of a boning knife:

    • It is a small knife, but not too small. They are typically 5-7 inches long.
      • This is an ideal size for getting into those tight places for intricate cuts.
    • The handle design has ergonomic grips for comfort during long trimming sessions.
      • If you are cooking for a family reunion or prepping a lot of ribs for a competition, this handle helps reduce hand fatigue.
    • The blade material is usually stainless steel or high-carbon steel.
      • These steels offer durability and hold edge retention longer than other steels.

    Boning Knife - Boning Knife Ergnomic Handle

    Using a Boning Knife to Trim Meat

    A boning knife is a necessity for BBQ. With its curved blade shape and tapered point, you can easily move around bones and cartilage.

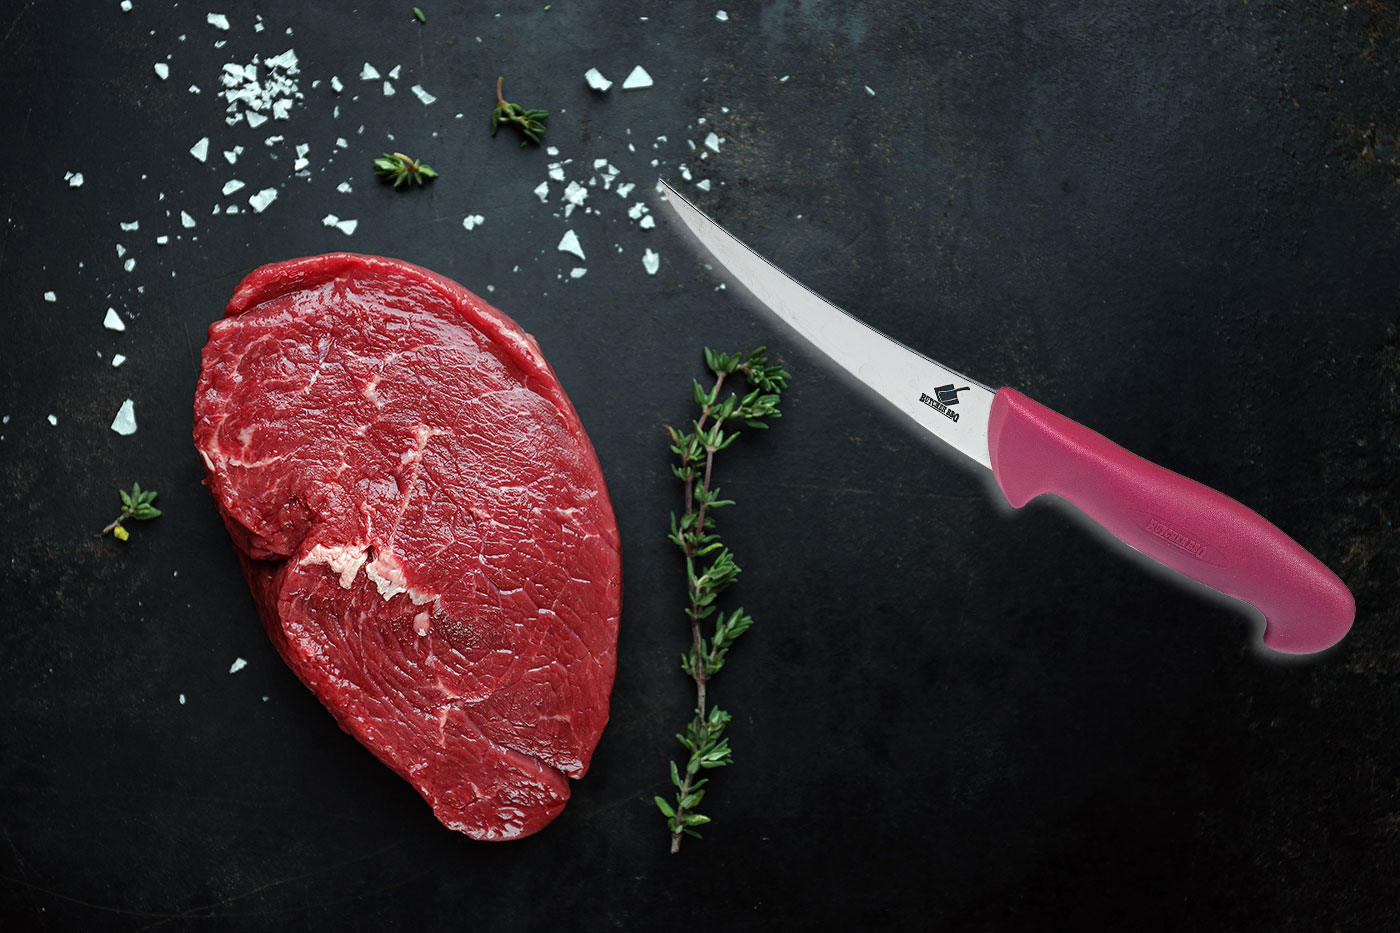
    The one I use is the Butcher BBQ Boning Knife. It is a 6-inch boning knife, which is a perfect length to trim meat for smoking.

    In addition to trimming a pork butt or brisket, it is a great knife for deboning chickens and turkey. The edge design is flexible enough to get around the joints. This allows for quick and easy removal of skin and fat in these areas.

    In Conclusion

    Ok, so there you have it. Quick, simple, and to the point on what is a boning knife. It is a pitmaster essential for your kitchen. It meets all the requirements for a great knife to trim meat for smoking.

    Now it’s your turn to get to trimming and firing up your BBQ!